

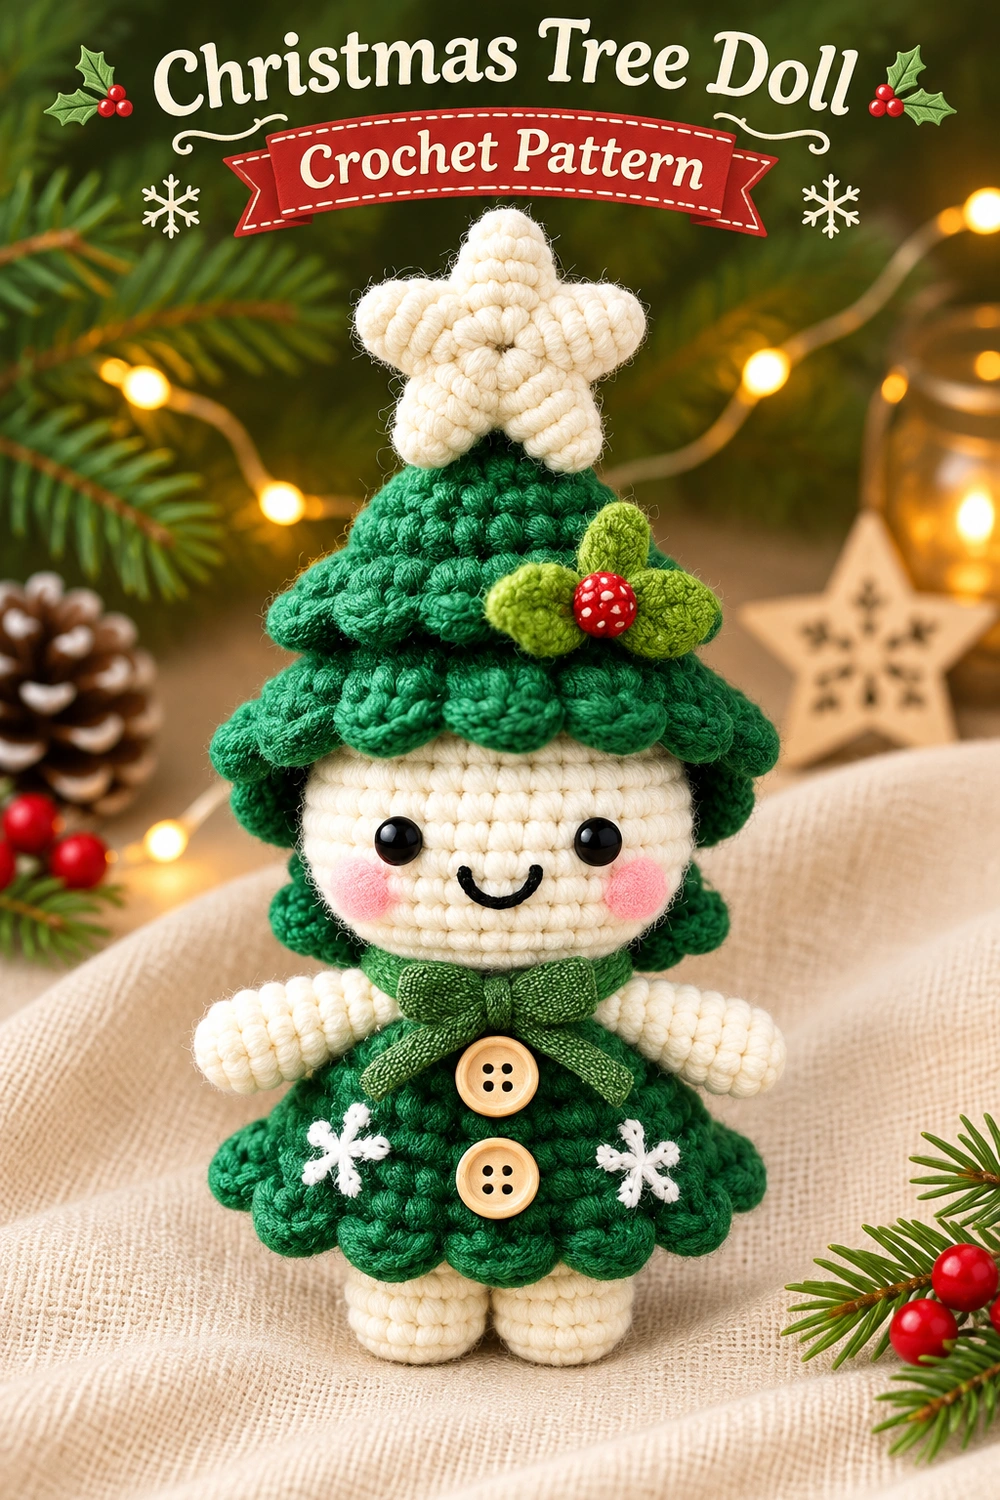
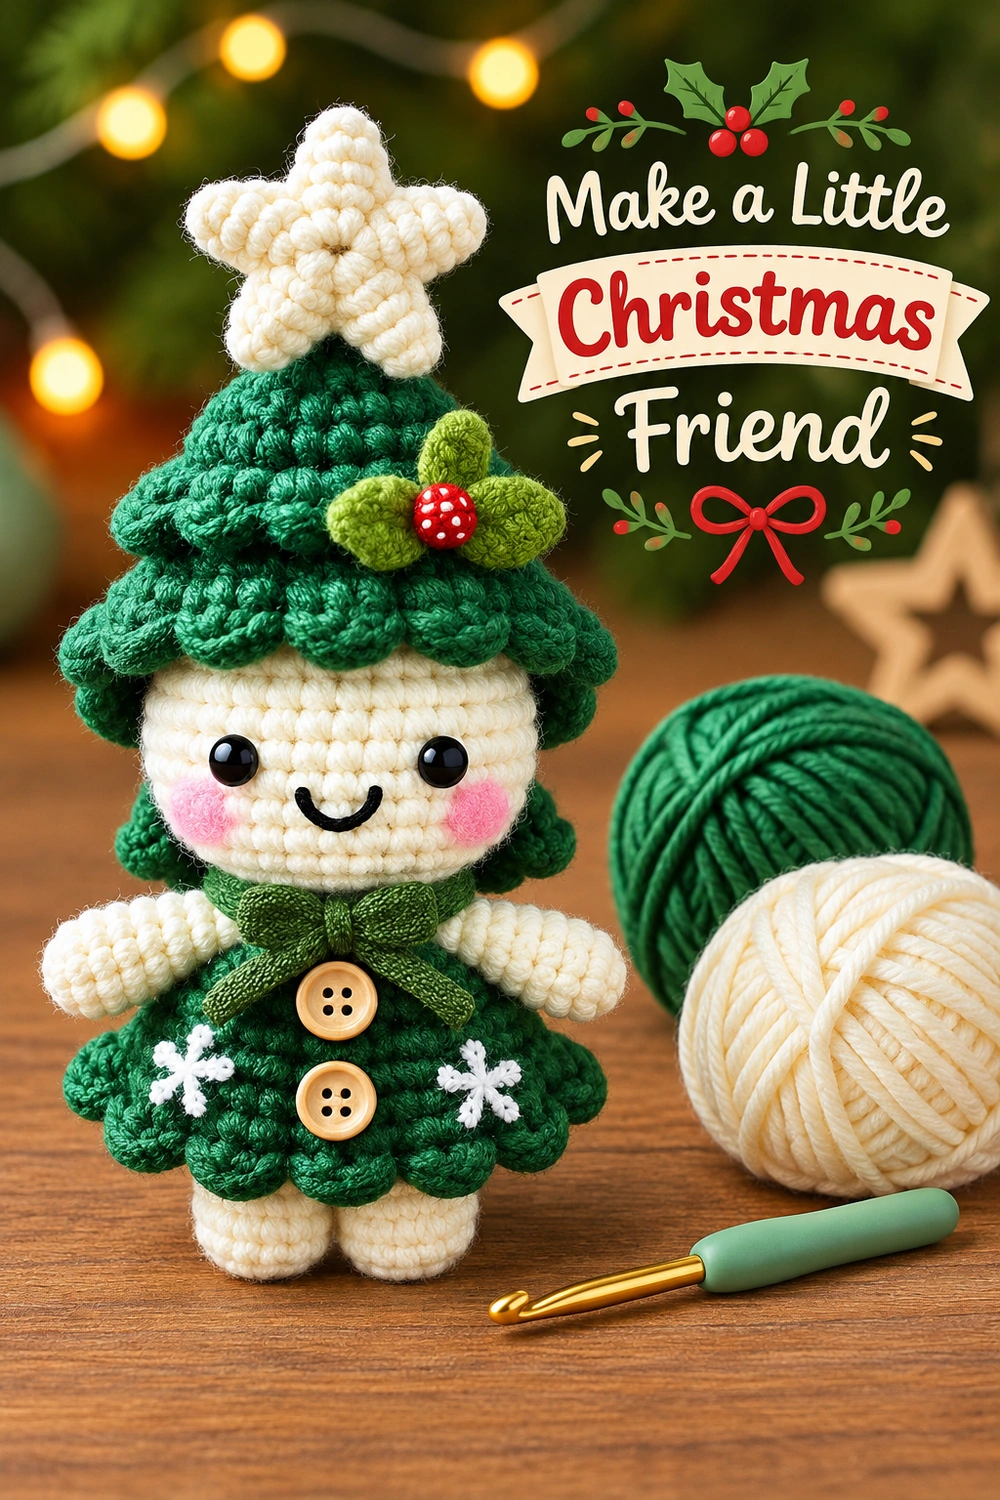
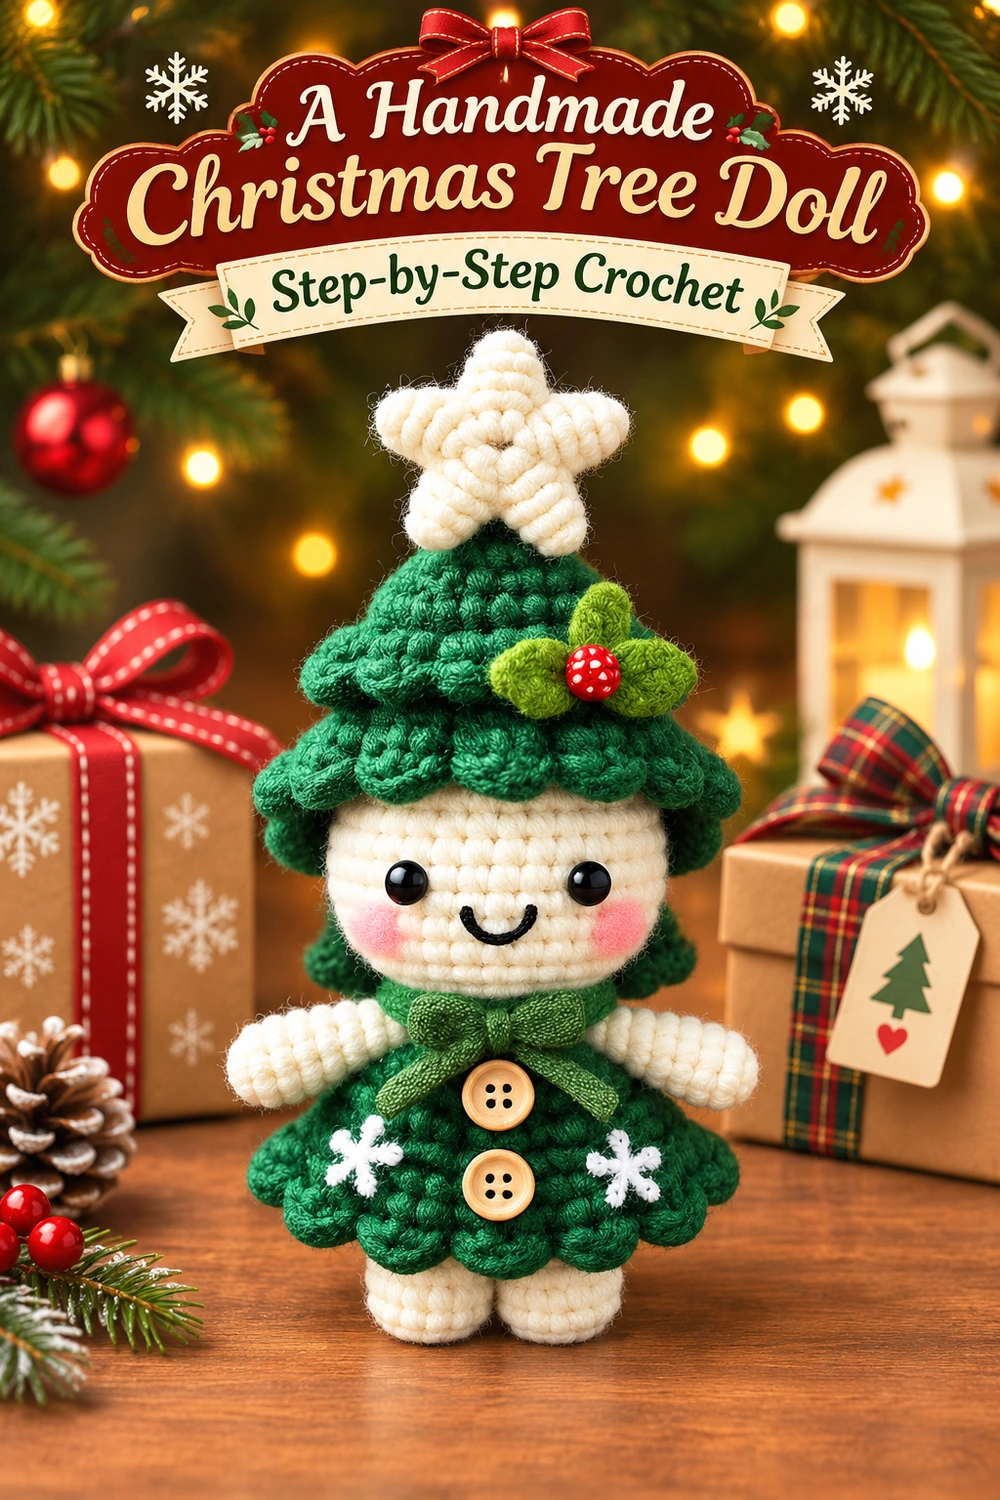
This Christmas Tree Doll Crochet Pattern makes a cheerful little character with an ivory face, short arms and feet, a scalloped green dress, and a tree-shaped hat topped with a five-point star. A dark green ribbon bow, two wooden buttons, holly, and white snowflake embroidery complete the festive outfit.
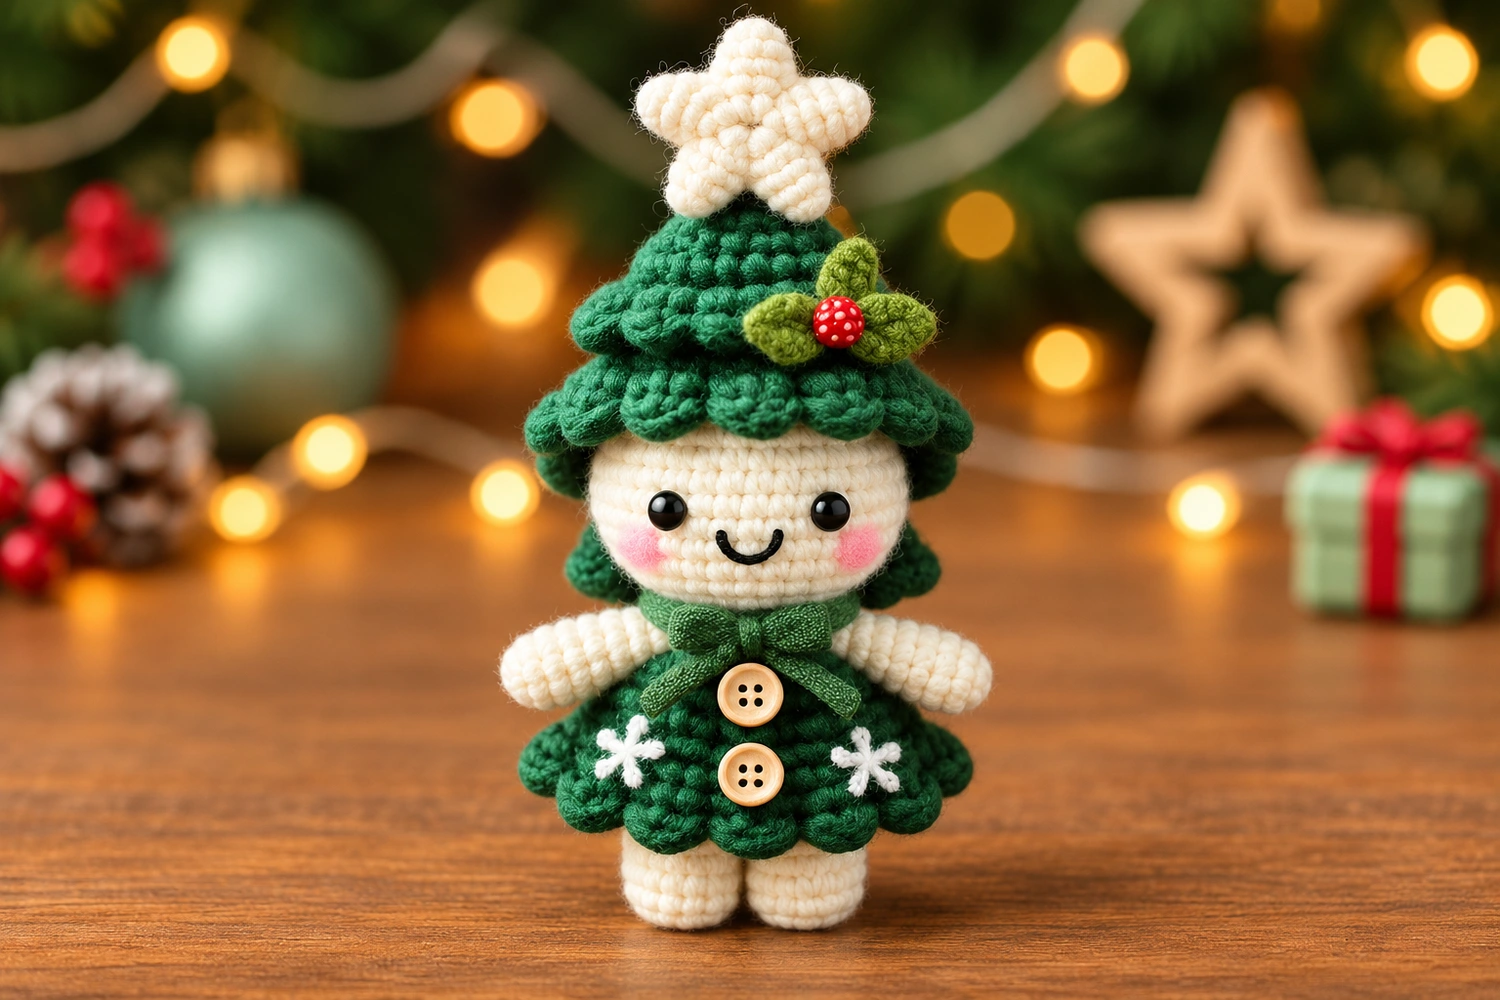
This is an independently written adaptation inspired by the supplied photograph, not a transcription of its original recipe. The stitch arithmetic has been checked, but a physical sample has not been crocheted. Measurements and quantities are estimates. The generated charts are visual schematics; follow the written tables and assembly directions for exact construction.
Materials and Preparation
- DK cotton: approximately 35–45 g green and 20–30 g ivory, plus small amounts of red, leaf green, black, and pink. Quantities are estimates.
- A 2.5 mm hook, stitch marker, yarn needle, scissors, pins, and polyester stuffing.
- Two small natural wooden buttons, approximately 8–10 mm, and dark green ribbon approximately 6–10 mm wide for the neck bow.
Estimated height is 17–21 cm including the star, depending on yarn and tension. Use the same yarn weight and hook for the crocheted components. Make firm fabric so stuffing does not show. Embroider the eyes for a soft all-yarn face; the photograph’s black eyes can be represented with compact satin stitches. This is an intermediate assembly project with surface crochet into reserved front loops.
US Terms and Techniques
Ch = chain; sl st = slip stitch; sc = single crochet; hdc = half double crochet; dc = double crochet; inc = 2 sc in one stitch; dec = sc two stitches together; BLO = back loop only. Brackets indicate repeats. Counts exclude height chains and joining slip stitches.
For an invisible decrease, pass the hook through the front loops of the next two stitches, yarn over and draw through both front loops, then yarn over and draw through the two loops remaining. For hdc, yarn over before insertion, pull up a loop, then draw through all three loops. For dc, yarn over, insert and pull up a loop, then draw through two loops twice.
Unless stated otherwise, work stuffed parts and the hat in a continuous spiral. Mark the first stitch of every round. When using BLO, the unused front loops remain available on the outside for a later tier. The dress uses joined rounds: ch 1 at the start, join to the first sc, and do not turn.
1. Green Inner Body
Begin at the bottom in green. The dress will cover this stuffed supporting body.
| Round | Instructions | Count |
|---|---|---|
| 1 | 6 sc in a magic ring | 6 |
| 2 | Inc in every stitch | 12 |
| 3 | [1 sc, inc] 6 times | 18 |
| 4 | [2 sc, inc] 6 times | 24 |
| 5 | [3 sc, inc] 6 times | 30 |
| 6–10 | Sc around for 5 rounds | 30 each |
| 11 | [3 sc, dec] 6 times | 24 |
| 12 | Sc around | 24 |
| 13 | [2 sc, dec] 6 times | 18 |
Sl st into the next stitch, fasten off, and leave a 40 cm sewing tail. Stuff the body with small pieces, keeping the bottom gently flattened and the neck opening round. Leave the 18-stitch top open for attaching the head. Keep the marker line at the back during assembly.
2. Ivory Head
| Round | Instructions | Count |
|---|---|---|
| 1 | 6 sc in a magic ring | 6 |
| 2 | Inc around | 12 |
| 3 | [1 sc, inc] 6 times | 18 |
| 4 | [2 sc, inc] 6 times | 24 |
| 5 | [3 sc, inc] 6 times | 30 |
| 6 | [4 sc, inc] 6 times | 36 |
| 7 | [5 sc, inc] 6 times | 42 |
| 8–13 | Sc around for 6 rounds | 42 each |
| 14 | [5 sc, dec] 6 times | 36 |
| 15 | [4 sc, dec] 6 times | 30 |
| 16 | [3 sc, dec] 6 times | 24 |
| 17 | [2 sc, dec] 6 times | 18 |
Before closing the lower head, mark two eye positions between rounds 10 and 11, approximately eight stitch widths apart across the front. Embroider two small black ovals with overlapping satin stitches. Embroider a U-shaped black smile below, spanning about four stitches across rounds 12–13. Make one curved stitch, then couch it down with a tiny stitch at its lowest point.
Add pink cheeks with several light pink stitches beneath and outside each eye. Stuff the head evenly, keeping it slightly wider than tall. Fasten off with a 30 cm tail, leaving the 18-stitch opening unclosed. Set aside while making the dress and limbs.
3. Ivory Arms — Make Two
Round 1: 6 sc in a magic ring (6). Round 2: [1 sc, inc] 3 times (9). Rounds 3–5: sc around (9 each). Round 6: [1 sc, dec] 3 times (6). Rounds 7–8: sc around (6 each).
Put only a tiny pinch of stuffing in the rounded hand end. Leave the upper arm soft. Flatten the six-stitch opening and sew the three front/back stitch pairs together. Leave a 30 cm tail for attaching. Both arms should bend outward without standing rigidly.
4. Ivory Feet — Make Two
Round 1: 6 sc in a magic ring (6). Round 2: inc in every stitch (12). Rounds 3–5: sc around (12 each). Stuff lightly. Round 6: dec 6 times (6). Cut a 30 cm tail, pass it through the front loops of the remaining six stitches, and pull closed.
Shape each little foot into a squat oval. Keep the sewing tail at the top/back so the smooth rounded end faces forward. Do not join the feet to each other; each will be sewn to the lower body.
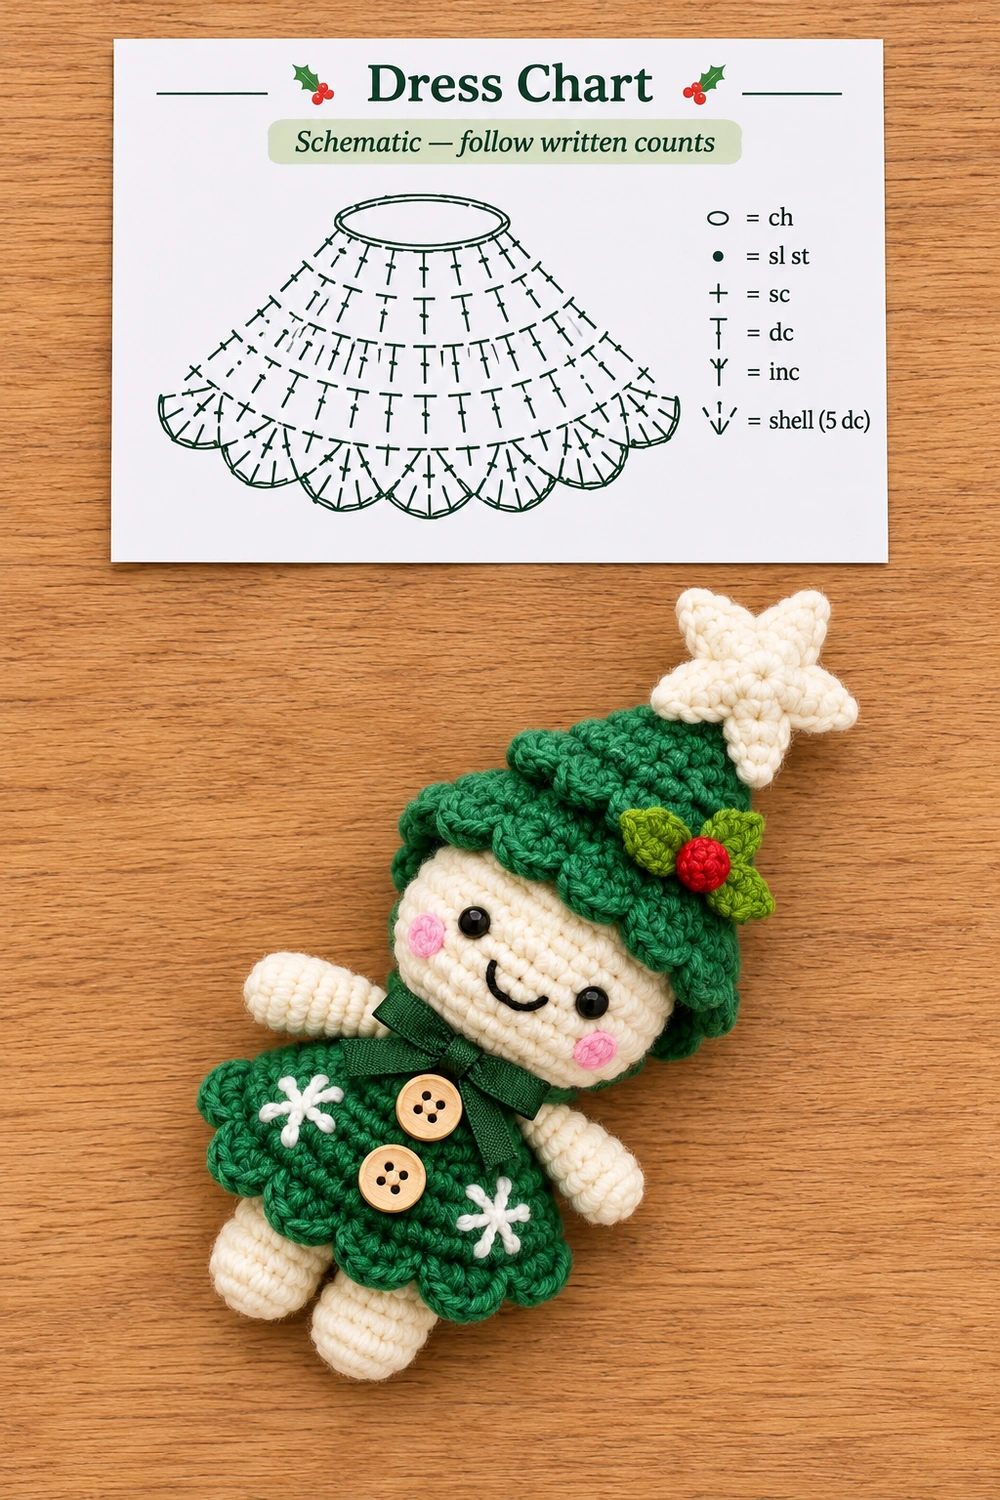
5. Green Scalloped Dress
Start at the neckline. Ch 18 loosely, check that the chain is untwisted, and sl st to the first chain to form a ring. Work joined rounds without turning. Ch 1 never counts as a stitch.
| Round | Instructions | Count |
|---|---|---|
| D1 | Ch 1; sc in each foundation chain; join | 18 sc |
| D2 | Ch 1; [2 sc, inc] 6 times; join | 24 sc |
| D3 | Ch 1; [3 sc, inc] 6 times; join | 30 sc |
| D4 | Ch 1; [4 sc, inc] 6 times; join | 36 sc |
| D5 | Ch 1; [5 sc, inc] 6 times; join | 42 sc |
| D6 | Ch 1; sc around; join | 42 sc |
| D7 | [Sl st in next st, skip 2 sts, 5 dc in next st, skip 2 sts] 7 times; join to first sl st | 7 shells |
Each shell repeat consumes six D6 stitches. The seven repeats use all 42 stitches. Fasten off and weave in the hem tail. The dress is open underneath and should flare away from the narrower body.
Before adding the head, place the dress over the body’s open neck, slipping the body through the dress’s lower opening. Match the 18 neckline stitches to the body’s 18 neck stitches. Sew these two edges together one stitch at a time with matching green yarn. Do not sew the flared hem to the body.
6. Tree Hat Cone
Work from the tip downward in green. On rounds 10 and 14 use BLO and mark the unused front-loop rings on rounds 9 and 13. These two rings will hold the branch tiers.
| Round | Instructions | Count |
|---|---|---|
| H1 | 6 sc in a magic ring | 6 |
| H2 | Sc around | 6 |
| H3 | Inc around | 12 |
| H4 | Sc around | 12 |
| H5 | [1 sc, inc] 6 times | 18 |
| H6 | Sc around | 18 |
| H7 | [2 sc, inc] 6 times | 24 |
| H8 | Sc around | 24 |
| H9 | [3 sc, inc] 6 times | 30 |
| H10 | Sc around in BLO; reserve front loops of H9 | 30 |
| H11 | [4 sc, inc] 6 times | 36 |
| H12 | Sc around | 36 |
| H13 | [5 sc, inc] 6 times | 42 |
| H14 | Sc around in BLO; reserve front loops of H13 | 42 |
| H15 | Sc around | 42 |
Sl st into the next stitch and leave a 50 cm sewing tail. Keep the hat unstuffed while adding the tiers. The open lower edge must fit around the head’s widest part; try it on before sewing. If tension makes the fit very tight, remake the hat with a slightly larger hook rather than stretching the face.
7. Hat Branch Tiers
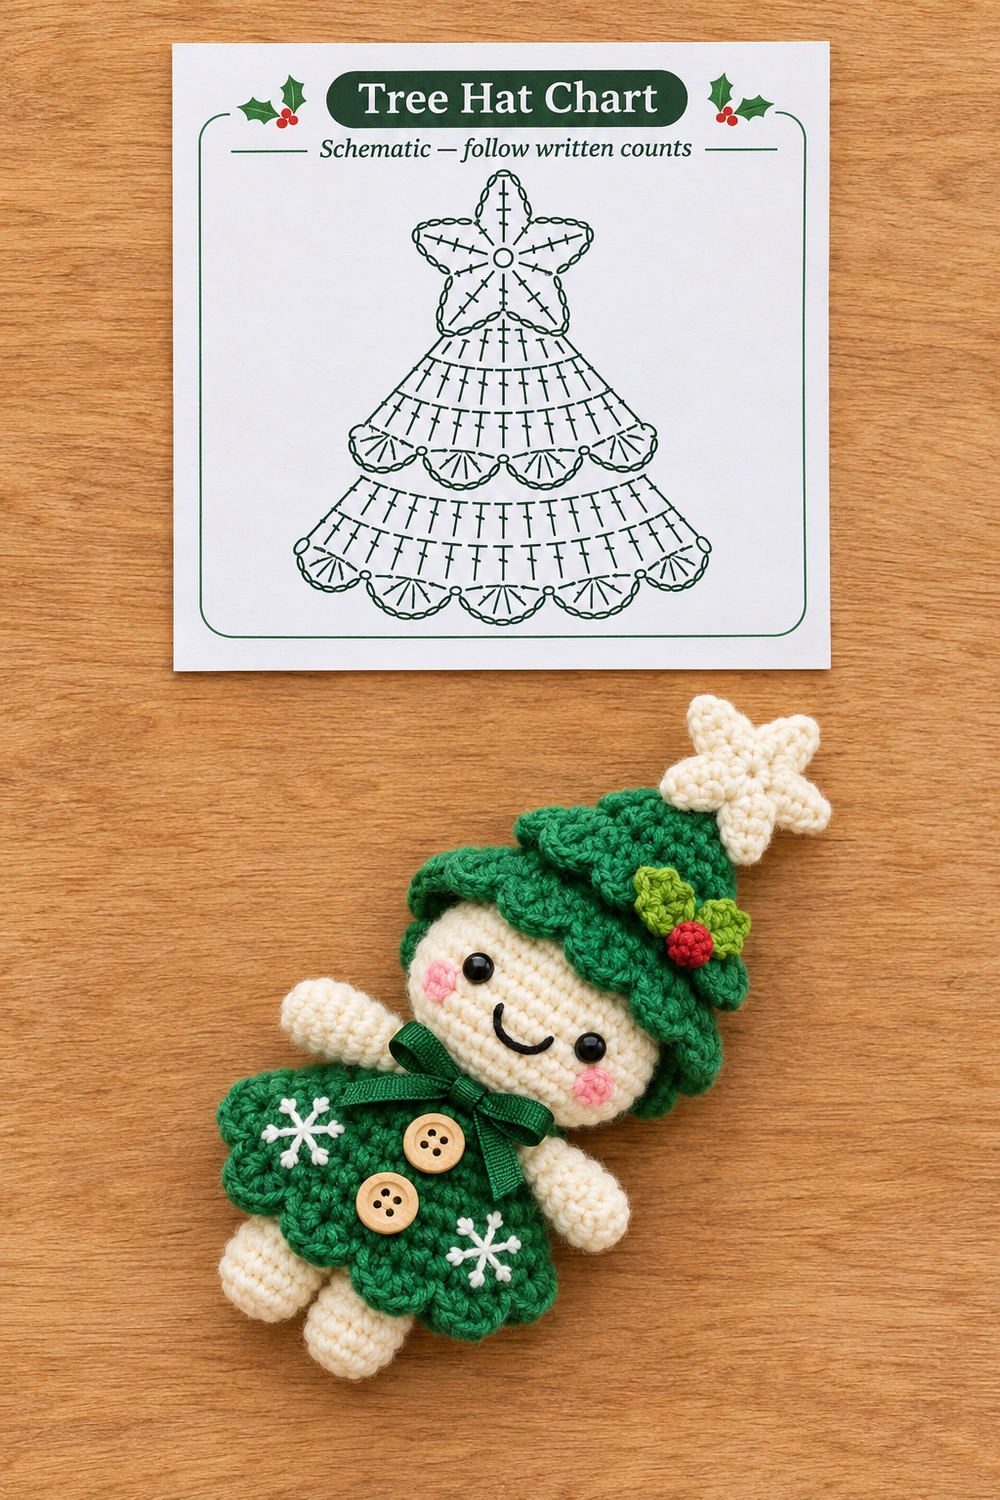
Hold the hat with its tip upward and the outside facing you. Join green into one unused front loop on H9. Work [sl st in next reserved loop, skip 2 reserved loops, 5 dc in next reserved loop, skip 2 reserved loops] 5 times around the 30 loops. Join to the first sl st, fasten off, and weave in. (5 shells)
Repeat in the 42 reserved front loops of H13, working the same six-loop repeat 7 times. (7 shells) The lower tier is wider. Work into the unused front loops only, not through both loops of the cone; the cone itself remains intact underneath. Fan each shell outward gently. Check that you have not skipped or reused a reserved loop.
8. Ivory Five-Point Star
Make two flat star panels. For each, work 10 sc into an ivory magic ring, pull closed, and join. For each point: sl st in the next old sc, ch 4; starting in the second chain from the hook work sl st, sc, hdc along the three chains; then sl st into the next old sc to anchor. Repeat this point sequence five times. Each point uses two old sc, so all ten base stitches are consumed.
Fasten off with a sewing tail. Place the two stars wrong sides together and whipstitch around corresponding edges, matching the five tips. Add just a tiny wisp of stuffing in the center before closing; keep the points flat. Sew the lower center of the star to the hat tip with several passes. No wire or rigid support is needed.
9. Holly Leaves and Red Berry
For each of three small green leaves, ch 6. Starting in the second chain, work sc, hdc, dc, hdc, then 3 sc in the last chain. Rotate along the underside of the foundation and work hdc, dc, hdc, then 2 sc into the starting chain that already holds the first sc. Join to the first sc. (12 stitches) Fasten off with a sewing tail. Shape the rounded leaf ends by hand.
For the berry, work 6 sc into a red magic ring, pull closed, and sl st to the first sc. Run the tail through the front loops of all six stitches and draw into a tiny nub. Sew the three leaf bases together in a fan on the front-right of the hat, between the tiers. Stitch the red berry over their meeting point. These simple oval leaves are a crocheted interpretation of the reference’s small holly decoration.
10. Snowflakes, Buttons, and Ribbon Bow
With ivory yarn, embroider one small snowflake on each lower-front side of the dress, leaving the center clear for the buttons. Make three straight stitches crossing at a common center, one vertical and two diagonal, forming six arms. Add two tiny angled stitches near the end of each arm if there is enough space. Secure on the inside of the dress without catching the inner body.
Sew the two wooden buttons in a vertical line at the center front, roughly over dress rounds D3 and D5. Use several passes through all button holes and the dress fabric. For an all-yarn alternative, replace each button with a tan disc of 6 sc in a magic ring, joined and sewn flat.
Tie the dark green ribbon into a small bow. Trim the tails to sit above the upper button. Secure the knot and the inner bases of both loops with matching sewing thread, then stitch the bow to the dress neckline. Do not rely on a loose ribbon tied tightly around the neck to hold the head.
11. Assemble the Doll
- Feet: Pin both ivory feet under the lower body, side by side with a narrow gap. Keep their rounded ends facing forward and their tops hidden beneath the dress. Sew each foot securely through several body stitches. The doll may need support to stand; independent balance has not been sample-tested.
- Arms: Pin the flattened arm ends on opposite sides of the body just below the neck, around body rounds 11–12. Position above the flaring dress so the hands project outward. Sew each closed end securely over several stitches.
- Head: Align the head’s 18-stitch opening with the 18-stitch dressed body neck. Keep the smile facing the buttons. Whipstitch one head stitch to one neck stitch all the way around. Add a final little pinch of stuffing into the neck before closing the last few stitches.
- Hat: Add a small amount of stuffing only in the cone’s upper tip if needed to support the star. Place the hat on the head with the lower tier above the eyes. Pin at front, back, and both sides. Sew H15’s edge to the head with small green stitches hidden beneath the lower tier.
- Final alignment: Check the star upright, holly on the front-right, both eyes visible, centered bow and buttons, and feet evenly placed. Weave in every tail and gently check all sewn attachments.
Finishing and Troubleshooting
The hat shells curl inward: gently spread the dc shells outward and check that each repeat used six reserved loops. Do not pull the joining slip stitches tightly. The head wobbles: add neck stuffing and reinforce the 18-stitch seam before covering it with the ribbon bow. The dress clings to the body: check the increases 18, 24, 30, 36, 42 and avoid sewing the hem down. The star droops: reduce its stuffing and secure a wider area of its lower center to the cone.
Clean according to the yarn and ribbon labels; spot cleaning is preferable when wooden buttons are used. Reshape the tiers and star and dry thoroughly. This version includes small sewn decorations and ribbon and is intended for display, away from babies and young children.
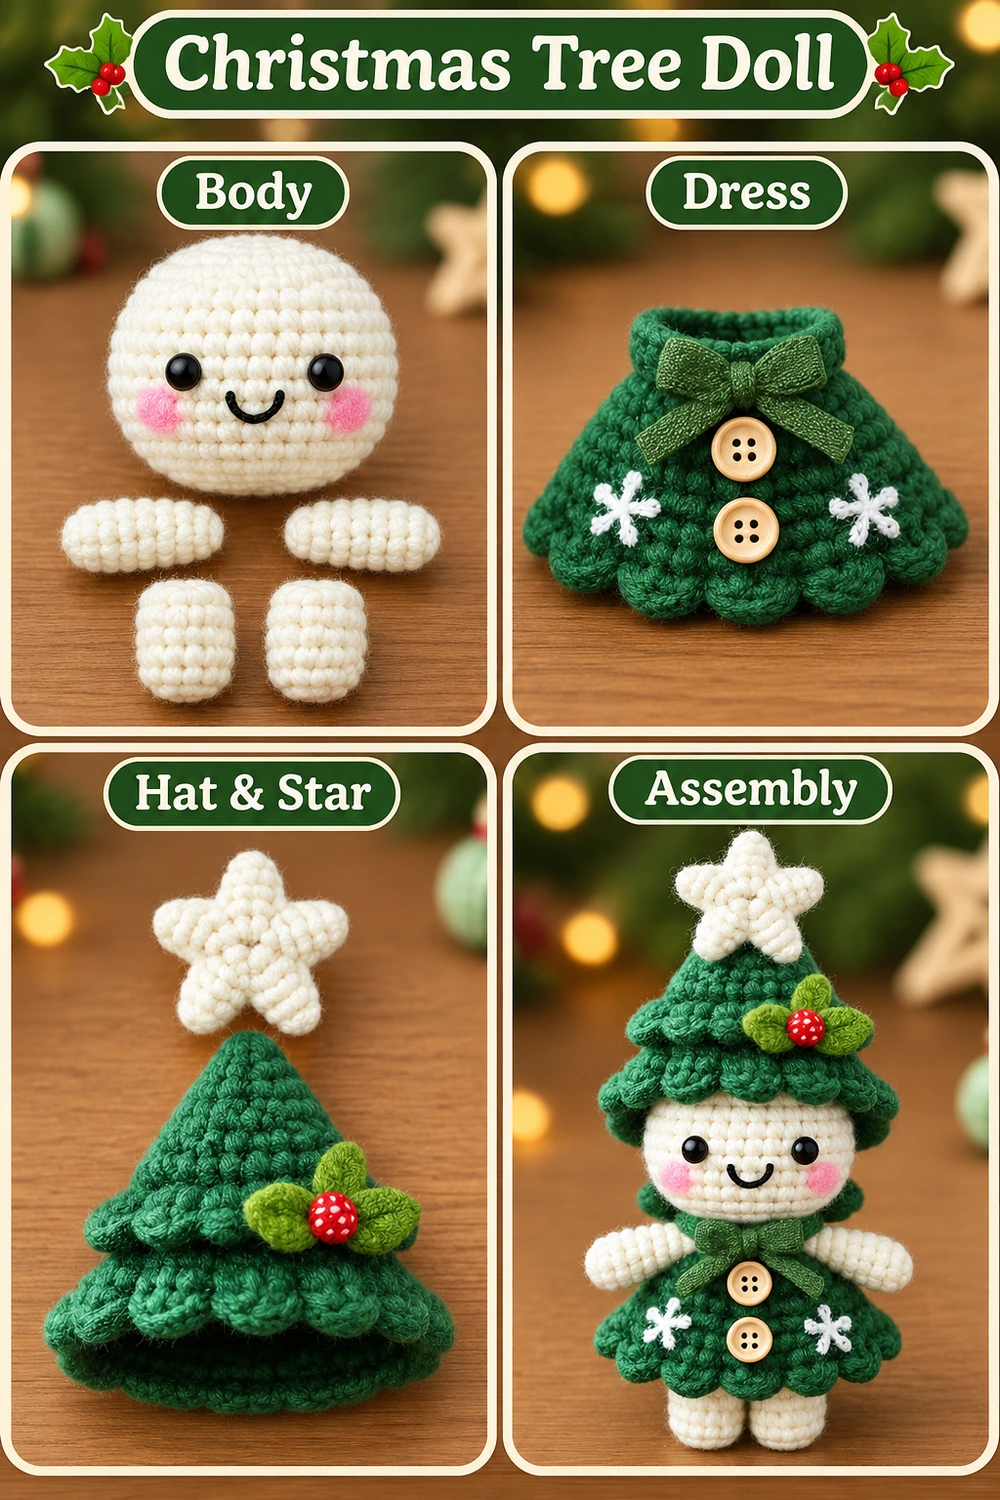
Christmas Tree Doll Visual Guide
The tutorial shows the main components. The tabletop charts are generated schematics for the dress and tree hat. Follow the written round counts, reserved-loop positions, and assembly instructions above.
More Christmas Crochet Projects
For another small holiday character, try the Christmas elf finger puppet. To review stitch terminology, refer to the Craft Yarn Council crochet abbreviations.


