

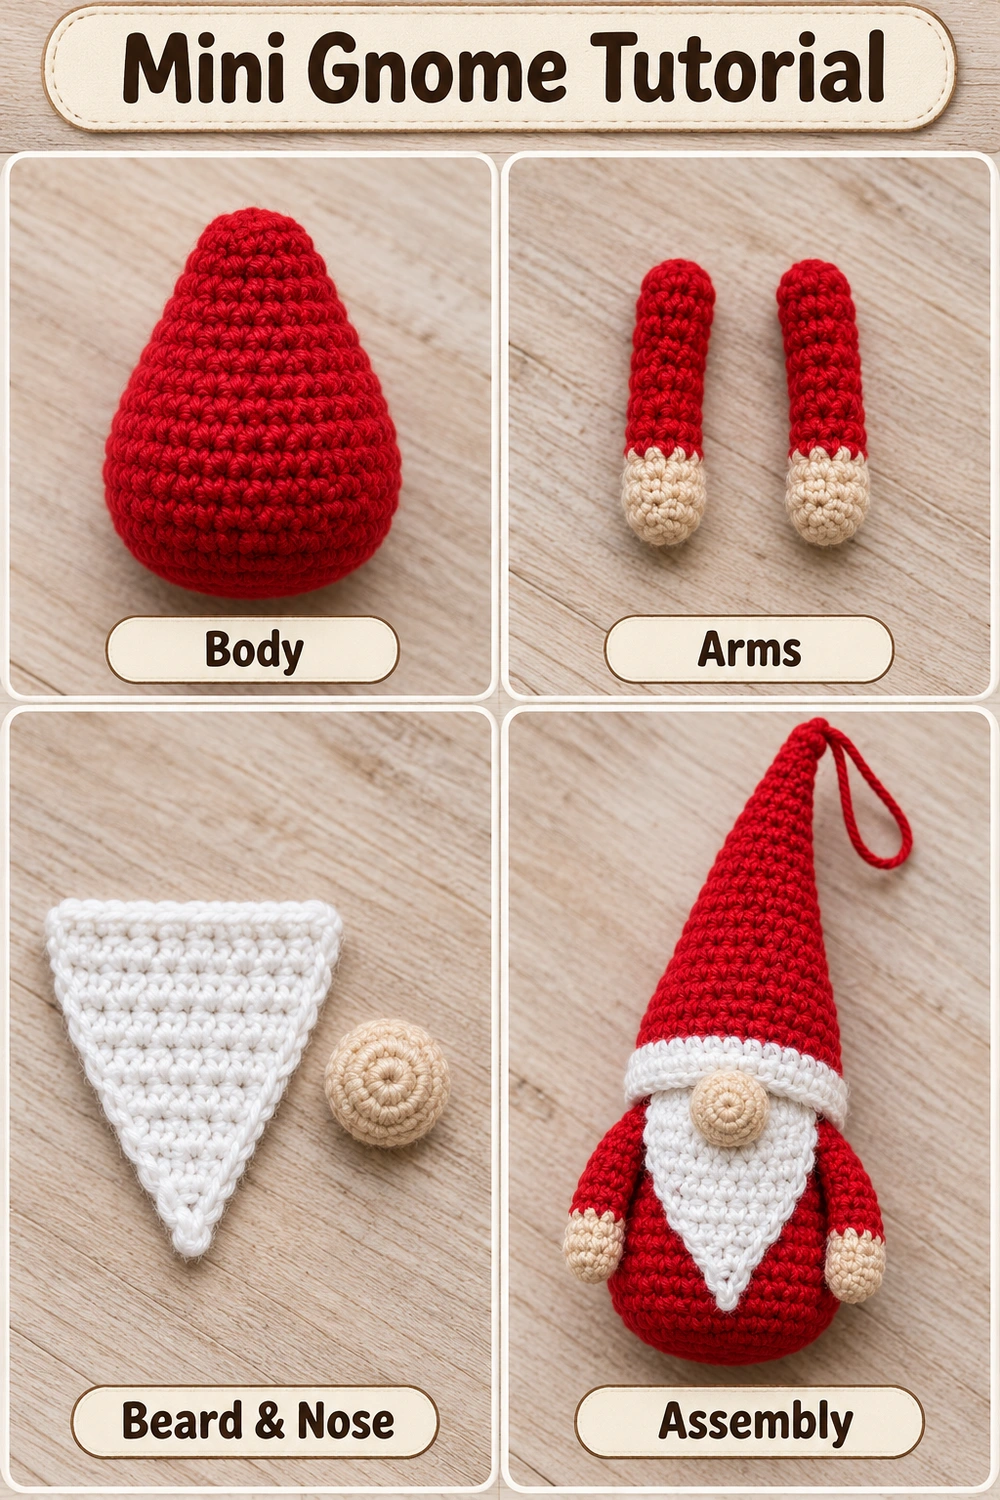
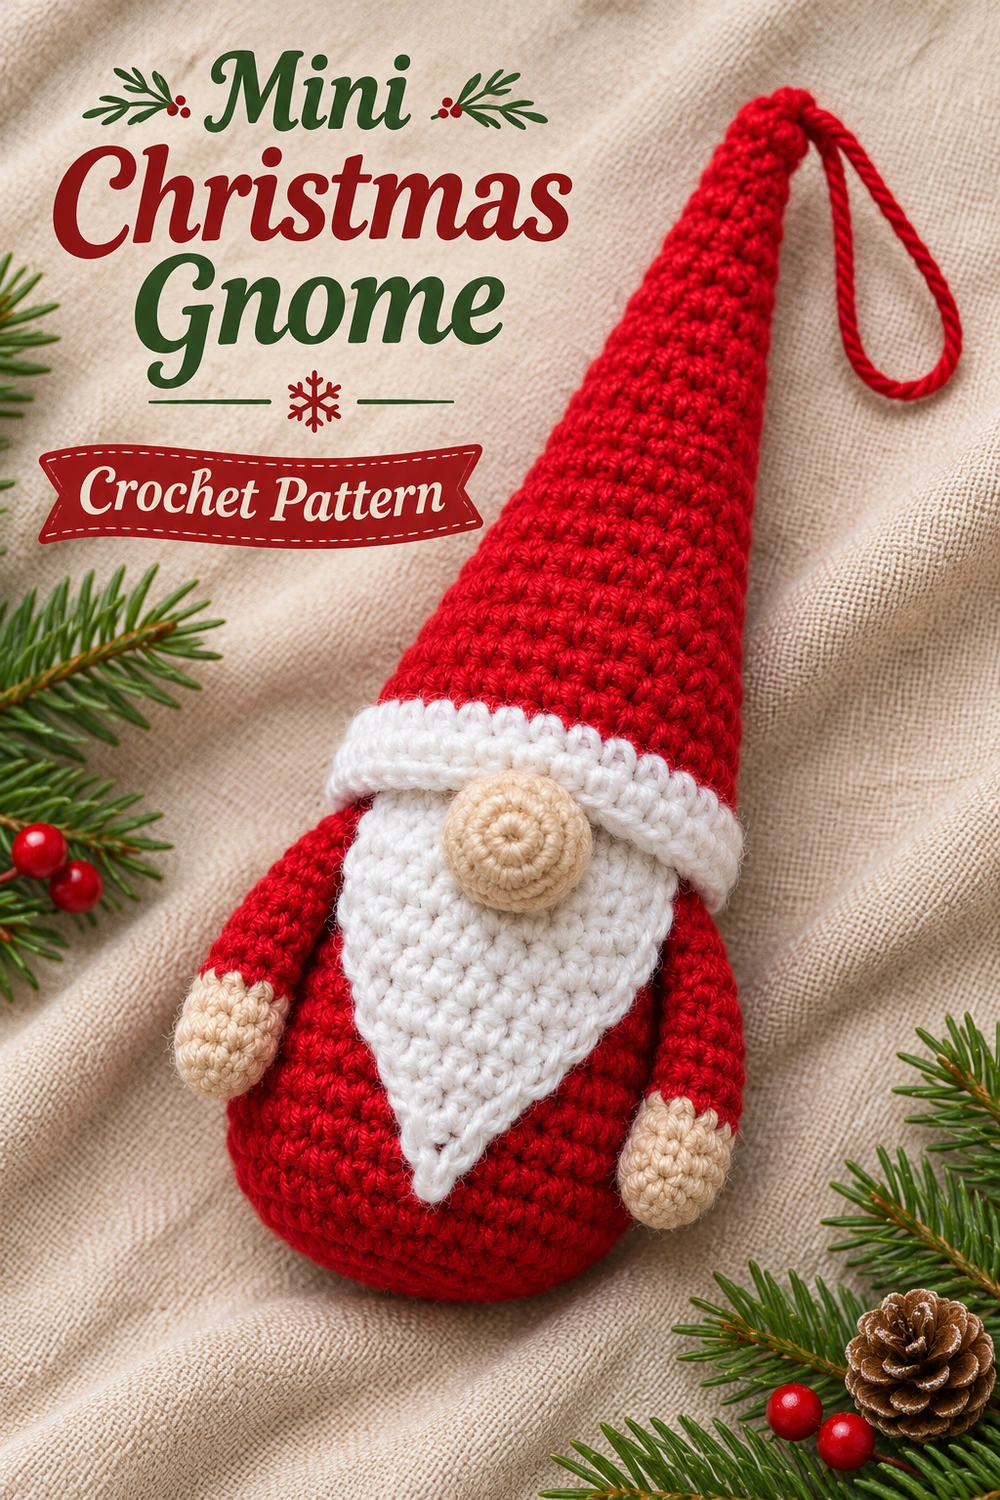
This Mini Red Christmas Gnome Crochet Pattern makes a plump hanging gnome with a tall pointed hat, white brim, triangular beard, round nose, and two little mittened arms. The hat covers the face, so there are no eyes to attach. Work each component separately, then sew it together using the placement guide below.

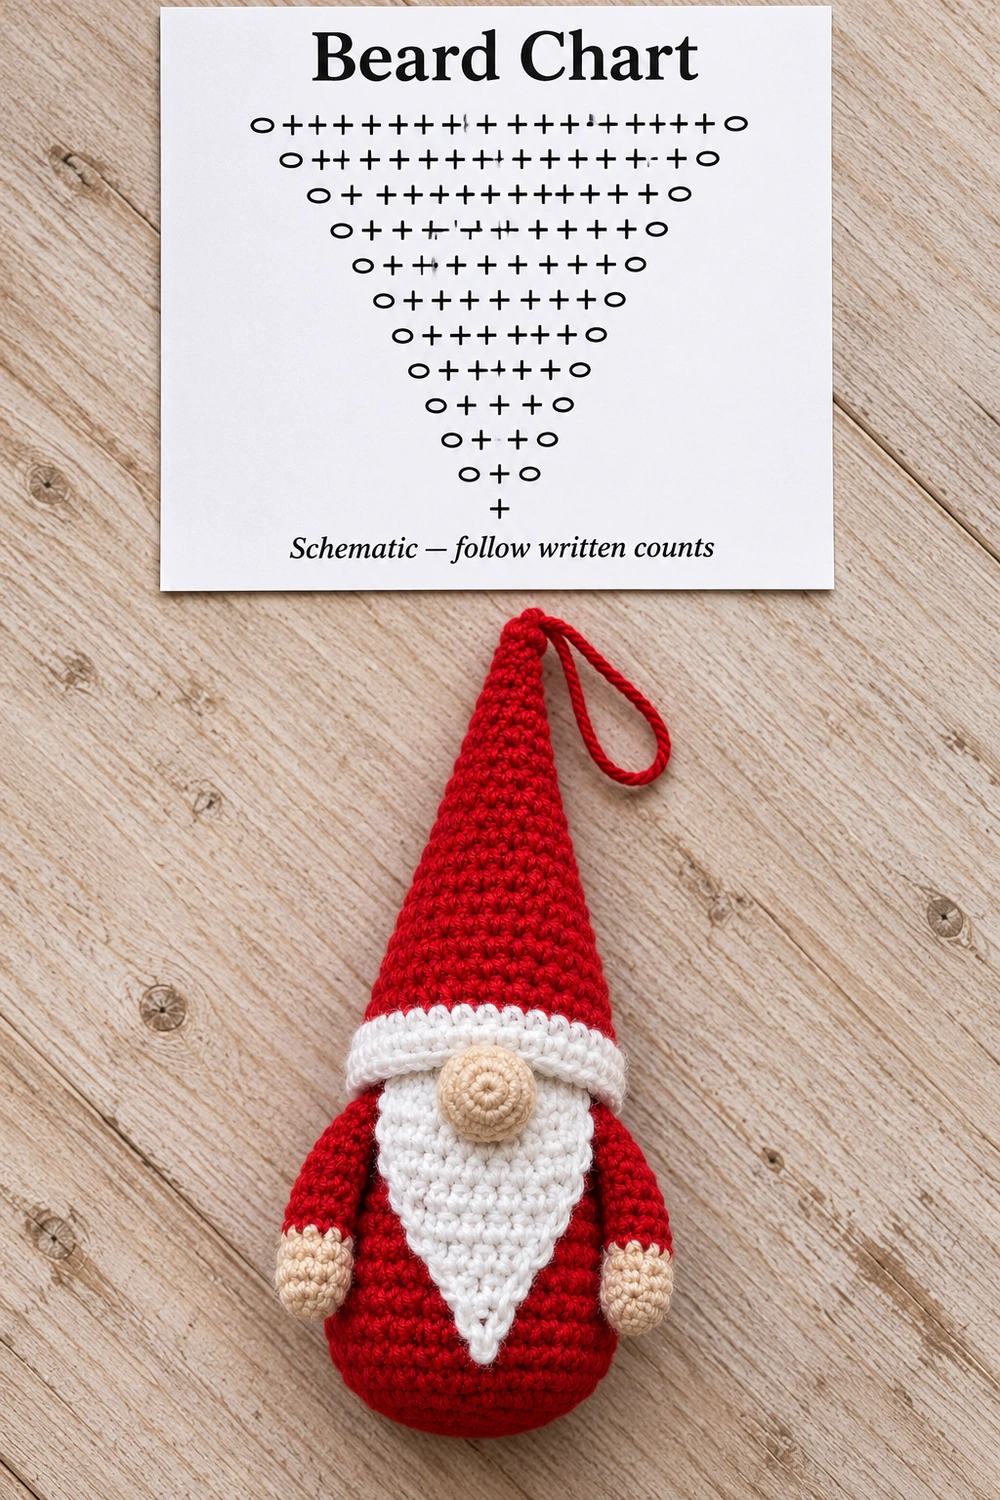
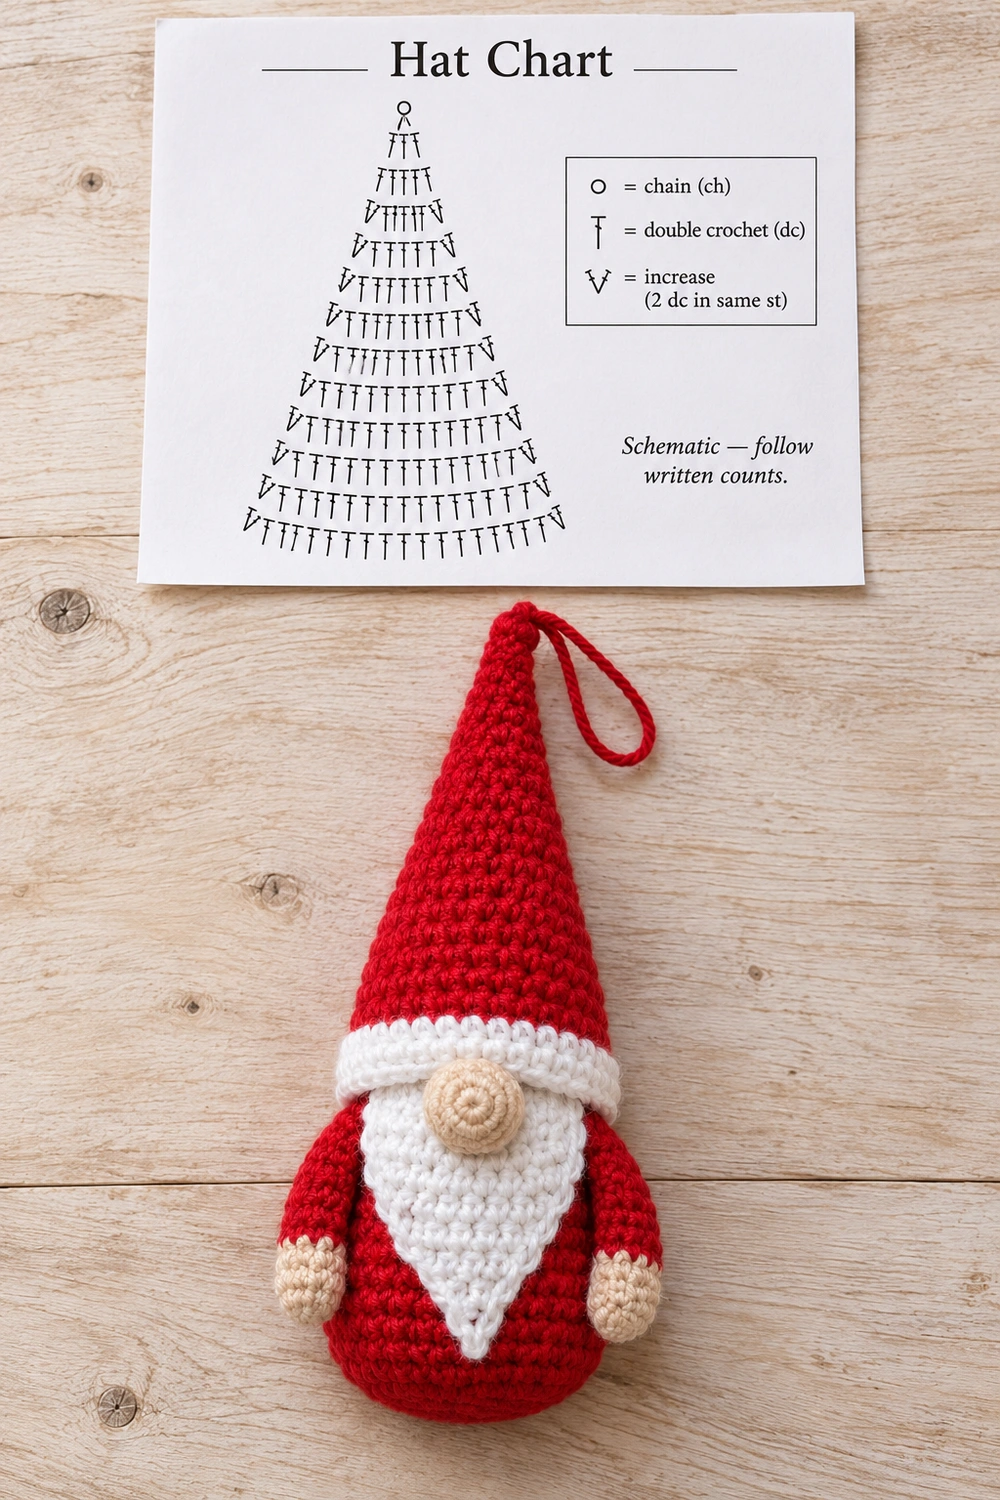
This is an image-inspired adaptation, not the original maker’s instructions. The stitch arithmetic has been checked, but a physical sample has not been crocheted. Finished proportions depend on yarn, hook, and tension; pin the pieces together before sewing. The generated visual charts are schematics; use the written counts for construction.
Mini Red Christmas Gnome: Materials, Size, and Preparation
- DK cotton yarn: approximately 25–35 g red, 10–15 g white, and 5 g beige. These are estimates; keep extra yarn available.
- 2.5 mm crochet hook, or a size that produces firm fabric without visible stuffing gaps.
- Polyester stuffing, stitch marker, blunt yarn needle, scissors, and removable sewing pins.
Estimated height: 17–21 cm excluding the hanging loop. Body width: roughly 6–7 cm. These are planning estimates rather than measured sample dimensions. Make all pieces with the same yarn weight and hook. A small swatch of single crochet should feel firm but flexible; use a smaller hook if stuffing shows through.
Mini Red Christmas Gnome: US Terms and Techniques
Ch = chain; sl st = slip stitch; sc = single crochet; inc = 2 sc in one stitch; dec = single crochet 2 together; BLO = back loop only. Brackets indicate a repeated sequence. Numbers in parentheses are the finished stitch count. A turning ch 1 never counts as a stitch.
For sc, insert the hook, yarn over and pull up a loop, yarn over and draw through both loops. For an invisible decrease on a stuffed component, insert the hook through the front loops of the next two stitches, yarn over and pull through both front loops, then yarn over and pull through the remaining two loops. On the flat beard, use a regular sc2tog through both loops: pull up a loop in each of the next two stitches, yarn over and draw through all three loops.
Work body, nose, arms, and hat in a continuous spiral without joining unless instructed otherwise. Mark the first stitch and move the marker after each round. To start a magic ring, wrap yarn into a loop, pull a working loop through, ch 1, then work the specified sc into the ring. Pull the tail firmly closed and weave it securely into the inside.
Mini Red Christmas Gnome: 1. Red Pear-Shaped Body
Begin at the bottom. Keep the beginning marker at the back of the gnome. Use red.
| Round | Instructions | Count |
|---|---|---|
| 1 | 6 sc in a magic ring | 6 |
| 2 | Inc in each stitch | 12 |
| 3 | [1 sc, inc] 6 times | 18 |
| 4 | [2 sc, inc] 6 times | 24 |
| 5 | [3 sc, inc] 6 times | 30 |
| 6 | [4 sc, inc] 6 times | 36 |
| 7 | [5 sc, inc] 6 times | 42 |
| 8–13 | Sc in each stitch for 6 rounds | 42 each |
| 14 | [5 sc, dec] 6 times | 36 |
| 15–16 | Sc around for 2 rounds | 36 each |
| 17 | [4 sc, dec] 6 times | 30 |
| 18–19 | Sc around for 2 rounds | 30 each |
| 20 | [3 sc, dec] 6 times | 24 |
| 21 | [2 sc, dec] 6 times | 18 |
| 22 | [1 sc, dec] 6 times | 12 |
| 23 | Dec 6 times | 6 |
Start stuffing after round 19. Fill the lower body firmly enough to hold its rounded shape, then add smaller pieces toward the top. Avoid stretching the stitches. After round 22, top up the stuffing. After round 23, cut the yarn with a 20 cm tail, thread it through the front loops of all six remaining stitches, pull closed, and weave the tail through the body. The closed crown will be hidden beneath the hat. Gently flatten the bottom with your palm; the ornament does not need a rigid base.
Mini Red Christmas Gnome: 2. Beige Nose
Work 6 sc in a magic ring for round 1. Round 2: inc in every stitch (12). Round 3: [1 sc, inc] 6 times (18). Rounds 4–5: sc around (18 each). Round 6: [1 sc, dec] 6 times (12). Add a small pinch of stuffing. Round 7: dec 6 times (6). Cut a 30 cm sewing tail, close through the front loops, and keep the tail for attaching. Shape into a rounded button with the magic-ring center facing forward and the closure against the beard.
Mini Red Christmas Gnome: 3. Flat White Triangular Beard
Work from the wide top edge toward the pointed tip in turned rows. Ch 17 loosely in white. Do not stuff the beard.
| Row | Instructions | Count |
|---|---|---|
| 1 | Sc in second ch from hook and in each remaining ch | 16 |
| 2 | Ch 1, turn, sc across | 16 |
| 3 | Ch 1, turn, dec, 12 sc, dec | 14 |
| 4 | Ch 1, turn, sc across | 14 |
| 5 | Ch 1, turn, dec, 10 sc, dec | 12 |
| 6 | Ch 1, turn, sc across | 12 |
| 7 | Ch 1, turn, dec, 8 sc, dec | 10 |
| 8 | Ch 1, turn, sc across | 10 |
| 9 | Ch 1, turn, dec, 6 sc, dec | 8 |
| 10 | Ch 1, turn, sc across | 8 |
| 11 | Ch 1, turn, dec, 4 sc, dec | 6 |
| 12 | Ch 1, turn, dec, 2 sc, dec | 4 |
| 13 | Ch 1, turn, dec twice | 2 |
| 14 | Ch 1, turn, dec once | 1 |
Fasten off and weave in the tip tail. Do not add an edging, which would change the intended size. Smooth the beard on a flat surface. If it curls, lightly dampen and pin it into a triangle until completely dry; follow the yarn label and do not press it flat with a hot iron. Use a separate white strand for sewing the foundation edge to the body.
Mini Red Christmas Gnome: 4. Mittened Arms — Make Two
Begin at the hand in beige. Round 1: 6 sc in a magic ring (6). Round 2: [1 sc, inc] 3 times (9). Rounds 3–4: sc around (9 each). Round 5: [1 sc, dec] 3 times (6). Stuff only the rounded hand with a tiny pinch. Change to red on the last pull-through of round 5, leaving tails inside.
Round 6: [1 sc, inc] 3 times (9). Rounds 7–13: sc around for seven rounds (9 each). Leave the upper sleeve unstuffed so it bends alongside the body. Sl st into the next stitch and cut a 30 cm tail. Flatten the opening, aligning the front and back walls; sew across the four matched stitch pairs and tuck the spare ninth stitch into the fold. Leave the remaining tail for attachment. There are no thumbs, feet, or legs in this design.
Mini Red Christmas Gnome: 5. Tall Red Hat and White Brim
Start at the tip in red. The slow three-stitch increases create the long cone. On each increase round, repeat the stated bracket exactly three times. The following plain round keeps the same count.
| Round | Instructions | Count |
|---|---|---|
| 1 | 6 sc in a magic ring | 6 |
| 2–3 | Sc around | 6 each |
| 4 | [1 sc, inc] 3 times | 9 |
| 5 | Sc around | 9 |
| 6 / 7 | R6: [2 sc, inc] 3 times; R7: sc around | 12 each |
| 8 / 9 | R8: [3 sc, inc] 3 times; R9: sc around | 15 each |
| 10 / 11 | R10: [4 sc, inc] 3 times; R11: sc around | 18 each |
| 12 / 13 | R12: [5 sc, inc] 3 times; R13: sc around | 21 each |
| 14 / 15 | R14: [6 sc, inc] 3 times; R15: sc around | 24 each |
| 16 / 17 | R16: [7 sc, inc] 3 times; R17: sc around | 27 each |
| 18 / 19 | R18: [8 sc, inc] 3 times; R19: sc around | 30 each |
| 20 / 21 | R20: [9 sc, inc] 3 times; R21: sc around | 33 each |
| 22 / 23 | R22: [10 sc, inc] 3 times; R23: sc around | 36 each |
| 24 / 25 | R24: [11 sc, inc] 3 times; R25: sc around | 39 each |
| 26 / 27 | R26: [12 sc, inc] 3 times; R27: sc around | 42 each |
| 28–30 | Change to white; sc around for three rounds | 42 each |
For a clean color change, complete the final pull-through of the last red sc with white. After round 30, sl st in the next stitch and cut a 45 cm sewing tail. Fold the white band outward once so the fold forms the lower edge. Do not sew the hat closed. Lightly stuff the red cone with small wisps, leaving the lowest 2 cm unstuffed so the brim settles around the body. Do not pack the tip tightly.
Mini Red Christmas Gnome: 6. Assembly and Placement
- Mark the front. Put the body’s round-start line at the back. Pin the beard’s 16-stitch foundation edge horizontally across the upper front, approximately along body round 18. Center its point downward. Its tip should rest above the lower body edge. Move the entire beard slightly up or down if your row gauge differs.
- Attach the beard. Sew its foundation edge securely to the body with small white stitches. Add two or three hidden tacks along each side to prevent curling, catching the back of the beard stitches rather than making visible stitches across its surface. Leave the pointed end free.
- Attach the nose. Center the nose over beard rows 1–3. Pin with its upper edge slightly above the beard foundation. Stitch the rear perimeter to the body through the beard. Pull gently so it sits proud of the beard without flattening.
- Position the arms. Pin their closed red ends at the left and right of the upper body, approximately body rounds 17–18, with the hands hanging beside the lower half of the beard. Check symmetry from the front. Sew each flattened shoulder firmly over several body stitches. Do not stitch the hands to the beard.
- Fit the hat. Slide the hat over the closed body crown. At the back it should overlap the body by about 3–4 rounds. At the front the white brim should meet the upper edge of the nose and conceal the beard’s top seam and shoulder attachments. Pin at front, back, and both sides before stitching.
- Sew the hat. Use the white tail and small stitches along the inside of the folded brim. Catch the body beneath the brim. Above the nose, secure to the upper beard/body seam, keeping the nose uncovered. Leave no gaps exposing stuffing.
Mini Red Christmas Gnome: 7. Hanging Loop and Finishing
With red, ch 26 and fasten off, leaving a 15 cm tail at each end. Thread both ends through the hat tip about one round below the magic ring, spacing the attachment points by one stitch. Sew each tail through several nearby stitches, knot securely on the inside where accessible, and bury the ends. The loop should not rely on a single strand through the magic-ring center. Gently tug to check the attachment before hanging.
Weave in every loose end. Shape the cone, smooth the beard, and compare both arms. If the hat tips forward, remove a little stuffing from its lower half before completing the seam. If the beard puckers, loosen its side tacks. Hand wash gently only if allowed by the yarn label, reshape, and dry flat. This small hanging decoration has sewn components and a loop; keep it out of reach of babies and young children.
Mini Red Christmas Gnome: Mini Gnome Visual Guide
The tutorial shows the assembly order. The two tabletop charts are visual schematics for the beard and hat, not independently tested instructions. Follow the written tables above for exact counts, shaping, and joins.


Mini Red Christmas Gnome: More Projects and Stitch Help
For another seasonal project, explore the Christmas tree doll crochet pattern. For US stitch terminology, consult the Craft Yarn Council crochet abbreviations.


