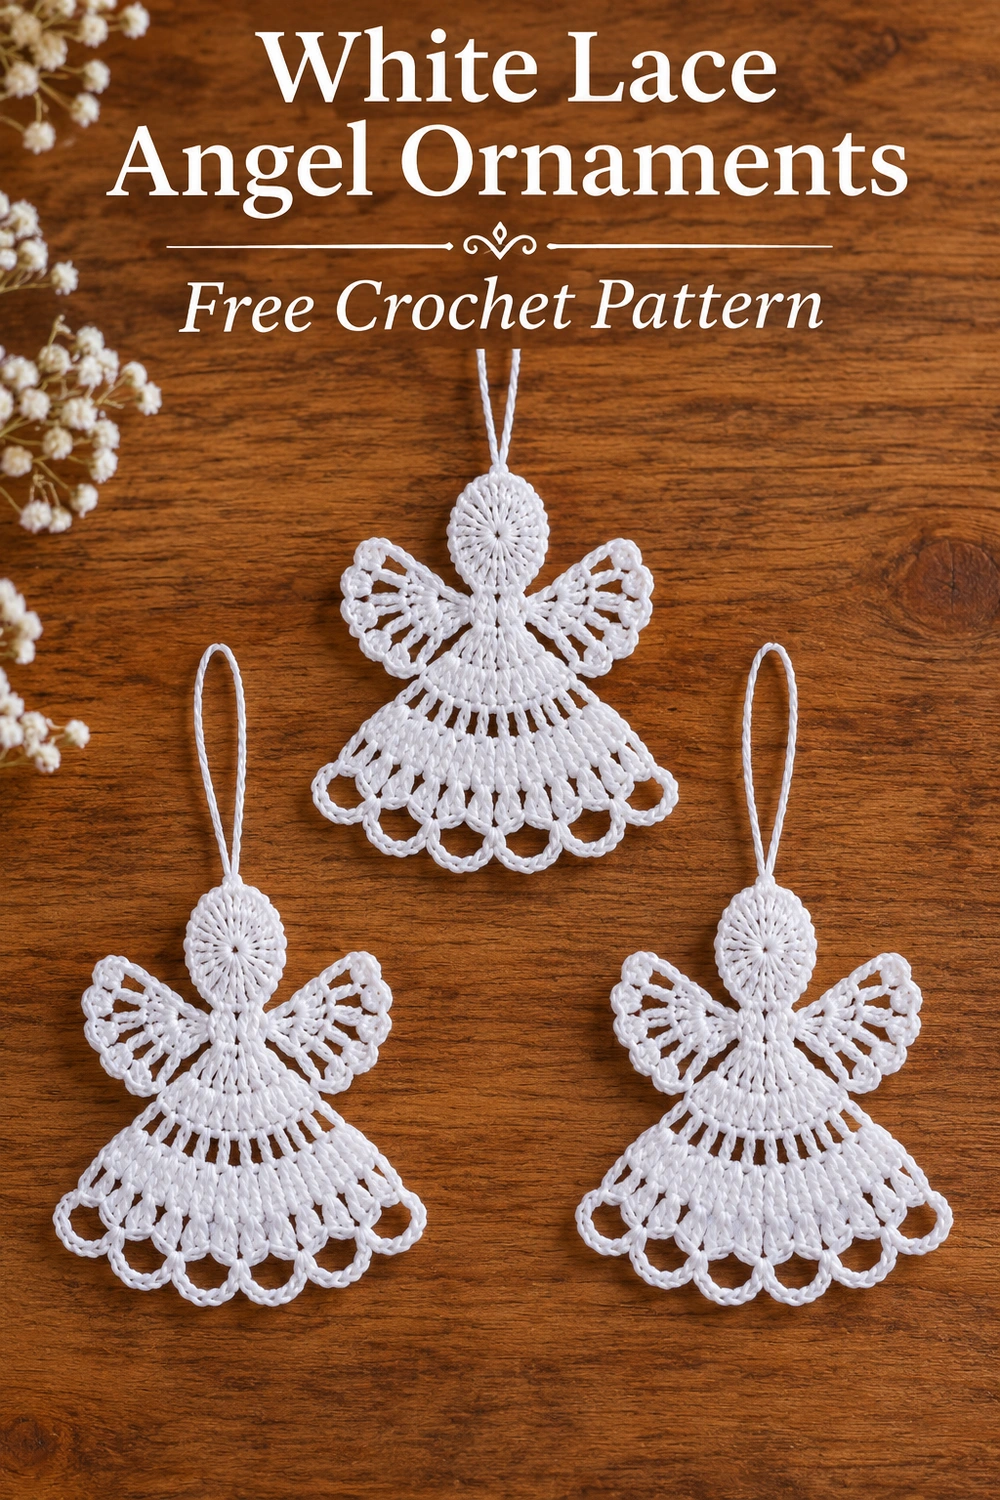
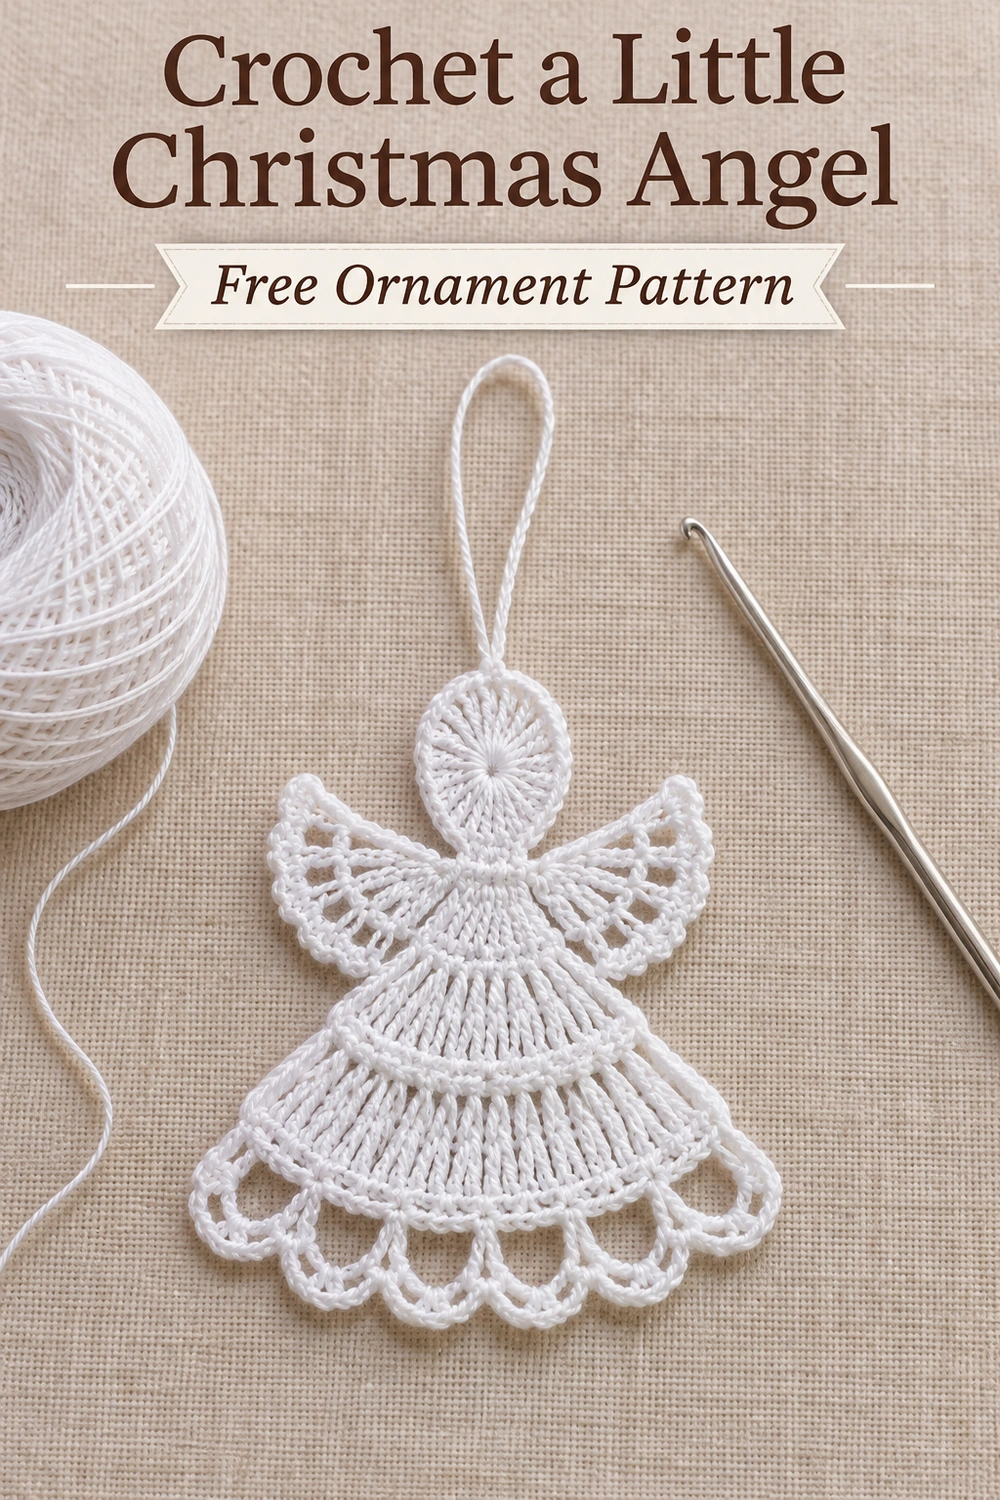
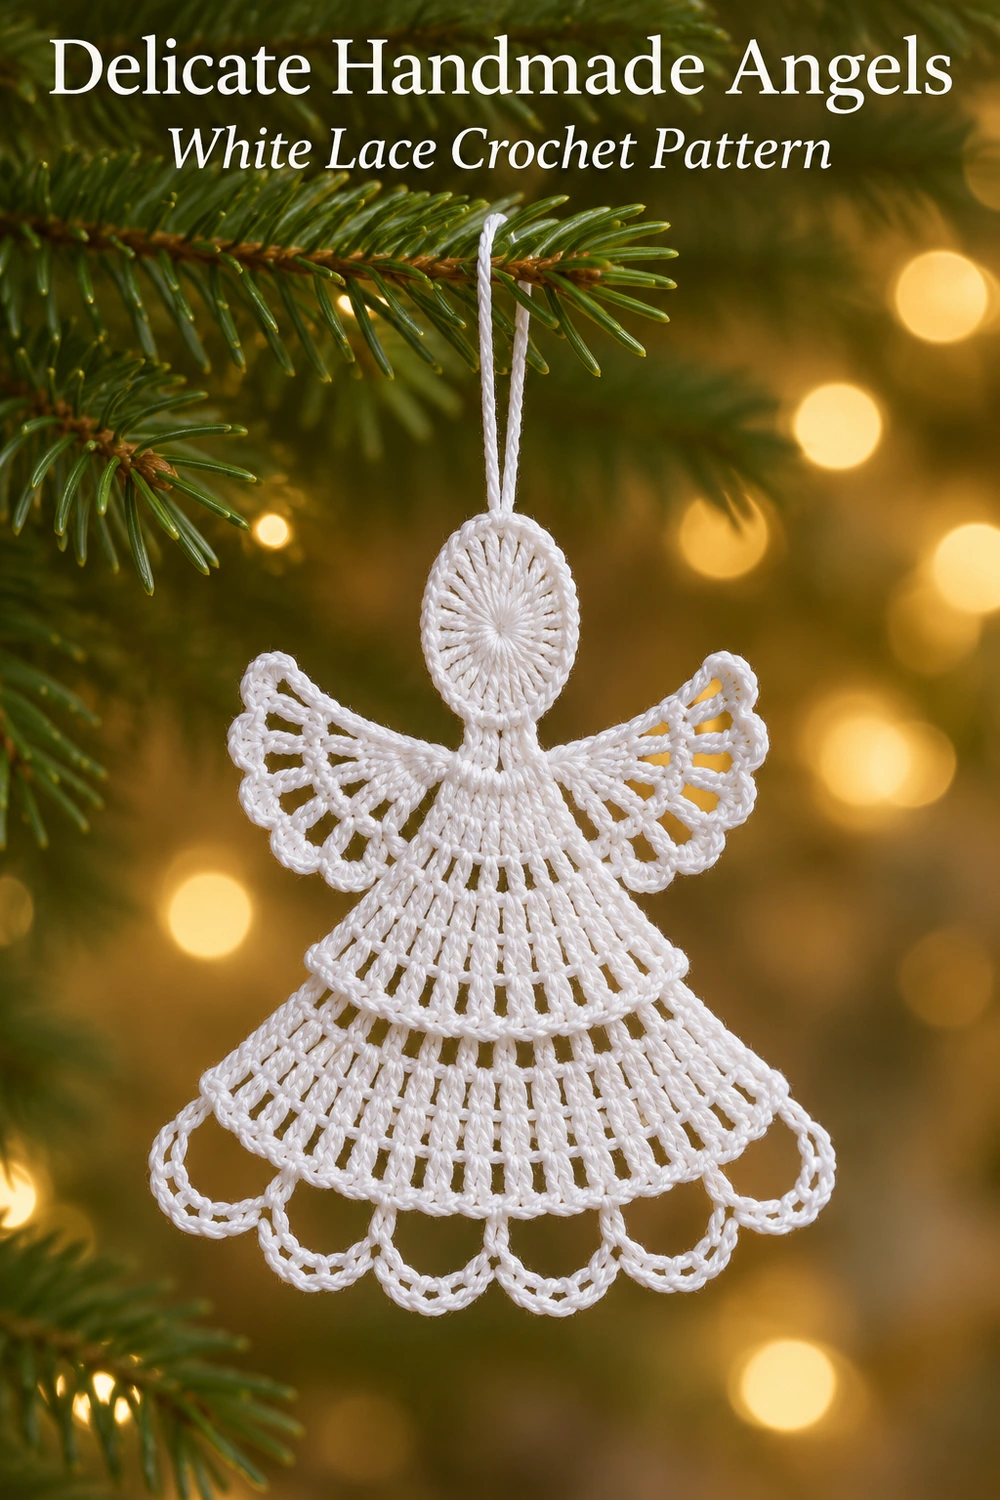
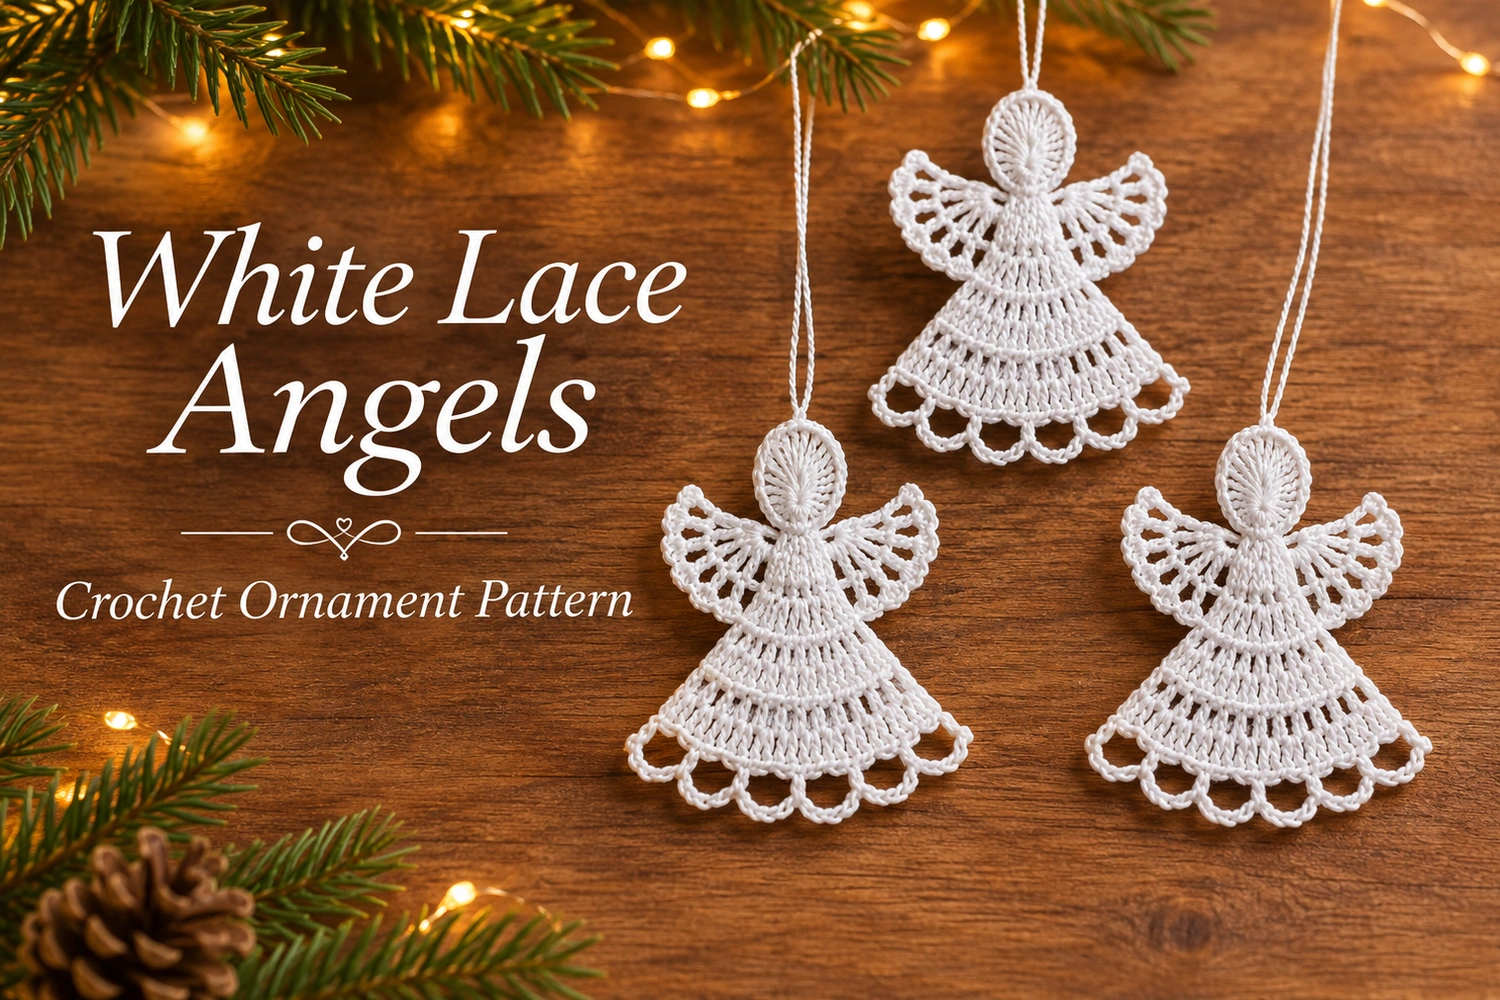
This White Lace Angel Crochet Pattern creates a small, delicate Christmas ornament with a flat oval-shaped head, tiny fan wings, and a flared dress finished with open chain scallops. A thin white cord makes it easy to hang the angel on a branch, a gift package, or a handmade garland.
The design follows the simple all-white appearance of the reference. Fine cotton shows the radiating stitches clearly, and the light, unstuffed pieces lie flat when stored between the holidays.
White Lace Angel Crochet Pattern: Project Details
- Skill level: confident beginner, with basic experience working into a ring and sewing small motifs together.
- Terms: US crochet terminology.
- Estimated size: about 6–8 cm tall, excluding the hanging cord; size depends on thread, hook, and blocking.
- Construction: a separate flat head, a three-row fan dress, and two small wings sewn at the neck.
- Appearance: white throughout, no face, no halo, and no stuffing.
This is an original image-inspired adaptation, not a transcription of another designer’s instructions. Stitch totals have been reviewed, but this version has not been physically crocheted or independently tested. Follow the written instructions for exact construction.
Materials
- Approximately 4–6 g of white size 3 crochet cotton, or another smooth fine cotton.
- A 2–2.25 mm hook, or a size suitable for your chosen thread.
- Tapestry needle and small scissors.
- A thin white cotton cord, about 18–20 cm long, for hanging.
- Blocking mat and rustproof pins.
- Optional suitable fabric stiffener if you prefer a firmer ornament.
Use the same cotton for the head, dress, and wings so the little pieces remain in proportion. A smooth thread keeps the open hem easy to see. If substituting a thicker yarn, expect a larger ornament and use a matching hook rather than trying to force heavy yarn through a very small hook.
Abbreviations and Counting Notes
- MR: magic ring.
- ch: chain.
- sl st: slip stitch.
- sc: single crochet.
- dc: double crochet.
- st / sts: stitch / stitches.
- ch-sp: chain space.
A beginning ch 3 counts as one dc wherever it starts a head round, dress row, or wing fan. The ch 1 at the start of the scalloped hem does not count as a stitch. Space chains are counted separately. The stitches in each fan are ordinary dc worked into the same ring or indicated stitches; do not join them at the top into a cluster.
1. Make the Flat Head
Make an MR. Ch 3, work 11 dc into the ring, and pull the ring closed. Join with a sl st to the top of the beginning ch 3. [12 dc including the beginning chain]
Fasten off with a 15 cm sewing tail. Flatten the circle gently. During blocking, shape it into a slightly upright oval, keeping its lower edge narrow enough to meet the dress at the neck. The head remains flat and unstuffed.
Weave the MR starting tail through several stitches on the back before trimming it. Keep the longer finishing tail available for sewing. Do not add eyes or a mouth: the reference relies on the simple silhouette.
2. Crochet the Fan Dress
Make the dress separately. Ch 4 and join with a sl st to the first chain, forming a small foundation ring. This ring will sit below the head at the neck. Work back and forth in rows, not around the full ring.
- Row 1: Ch 3 and work 6 dc into the foundation ring. Turn. [7 dc]
- Row 2: Ch 3 and dc in the first st; work 2 dc in each of the next 5 sts; work 1 dc in the top of the beginning ch 3 from Row 1. Turn. [13 dc]
- Row 3 — open scalloped hem: Ch 1, sc in the first dc; (ch 5, skip 1 dc, sc in the next dc) 6 times. [7 sc and six ch-5 arches]
Fasten off, leaving a sewing tail if desired. The dress widens through two dense rows of radiating stitches. Six open arches finish the lower edge without filling the spaces with another row of solid stitches.
Check Row 2 before working the hem: the first stitch receives the beginning ch 3 and one dc, the next five stitches receive two dc each, and the final stitch receives one dc. That makes 13 dc. The hem starts in dc 1 and anchors after each skipped stitch in dc 3, 5, 7, 9, 11, and 13.
3. Make Two Tiny Fan Wings
For each wing, ch 4 and join with a sl st to the first chain to form a small ring. Ch 3, work 4 dc into the ring, then ch 3 and sl st back into the ring. [5 dc including the beginning ch 3, plus a separate ch-3 return arch]
Fasten off with a long sewing tail. Make a second identical wing. Each wing is a small flat fan, with its ring at the inner shoulder and its broad curved edge pointing outward. The return chain rounds the free side of the fan; it is not counted as another dc.
Lay the wings beside one another before sewing. Compare all five dc on each one and make sure their return chains have equal tension. You can flip one wing when placing them behind the neck to create a mirrored arrangement.
4. Block the Pieces
Lightly dampen the head, dress, and wings. Pin the head into a gentle upright oval, spread the dress evenly, and open all six hem arches. Shape each small wing into a balanced fan.
Keep the dress foundation ring at the top and arrange the scallops into a soft curved hem. Do not stretch the lace until it becomes rigid or pulls the sc anchors out of shape. Allow every piece to dry completely before removing the pins.
If you prefer a firmer finish, test a suitable fabric stiffener on a scrap of the same cotton, then follow its directions. Use a light application so the open loops and stitch texture remain visible.
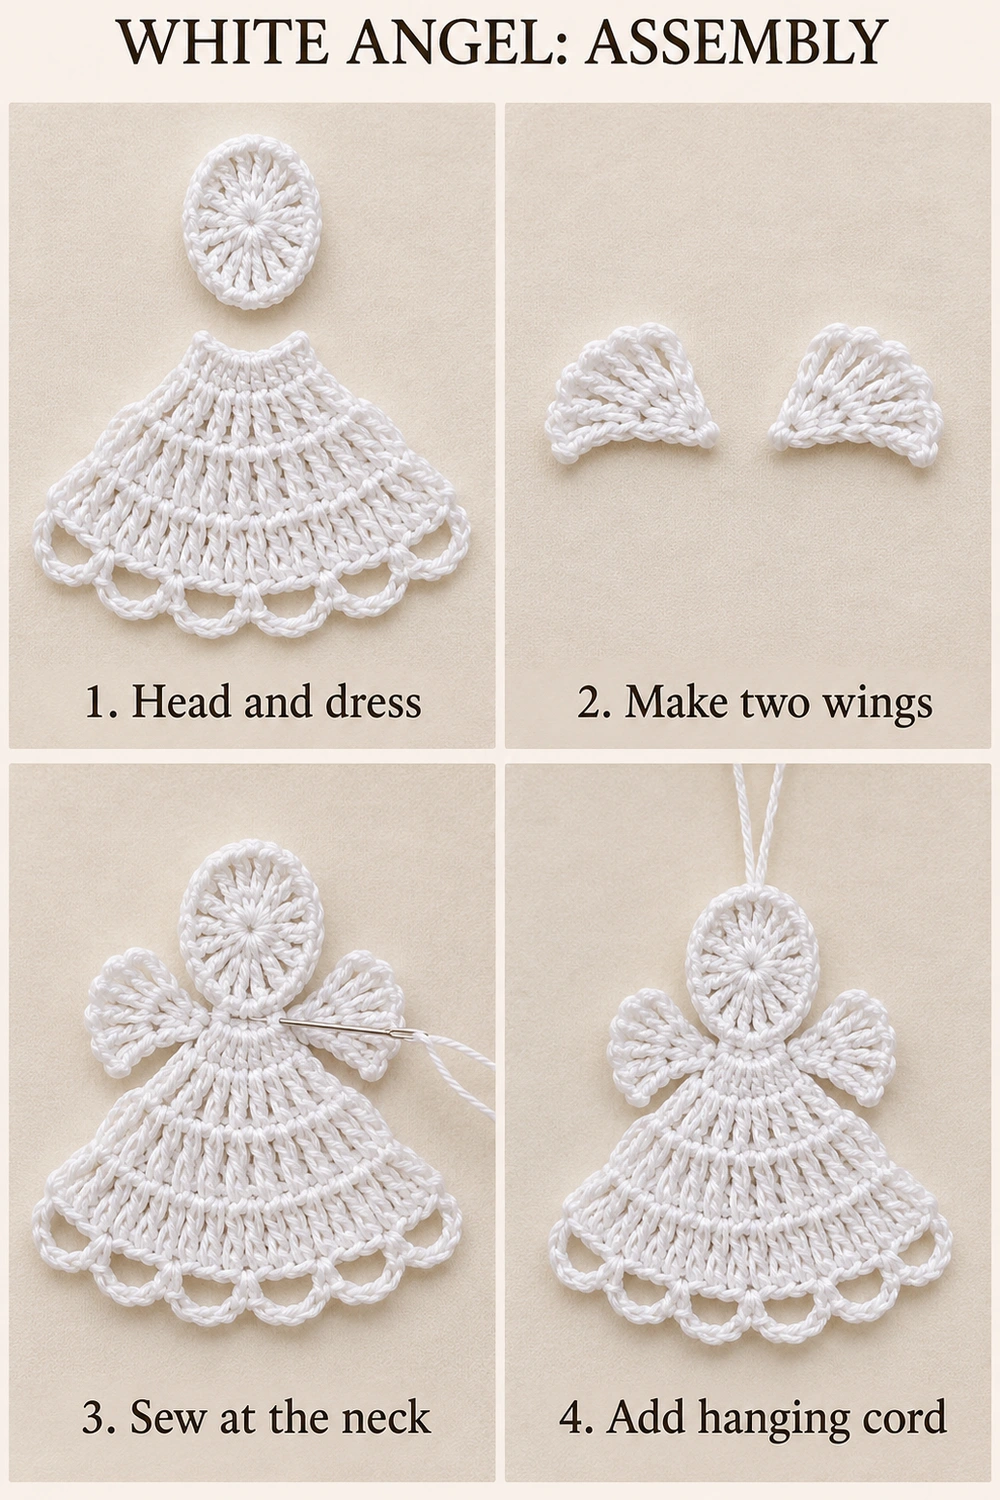
5. Sew the Angel Together
- Lay the dress face up with its small foundation ring pointing toward the head.
- Place the head above that ring. Sew the ring to two adjacent stitches along the head’s lower edge, making several small passes to form a narrow neck.
- Place the wings behind the neck, one on each side. Bring each wing’s foundation ring to the shoulder join, with its fan opening outward.
- Sew each wing ring and one or two nearby stitch bases securely to the back of the neck and upper dress. Leave the outer fan edge free.
- Check the front for symmetry before fastening and weaving in all remaining tails.
Keep the head directly above the center of the dress. Avoid overlapping it so far that the upper fan disappears. The wing joins should be small and neat, with all sewing tails hidden on the back rather than stretched across open spaces.
6. Add the Thin Hanging Cord
Fold the white cord in half. Pass its folded midpoint through a stitch at the top center of the head, then pull both loose ends through that midpoint to make a small lark’s-head attachment. Bring the loose ends together and tie an overhand knot near their tips, leaving a loop large enough for your branch or hook.
Alternatively, crochet a separate ch-20 loop from the same cotton and sew both ends to the head’s top center. Whichever hanger you choose, anchor it through the head stitches rather than through a loose tail.
Reading the Two Tabletop Stitch Guides
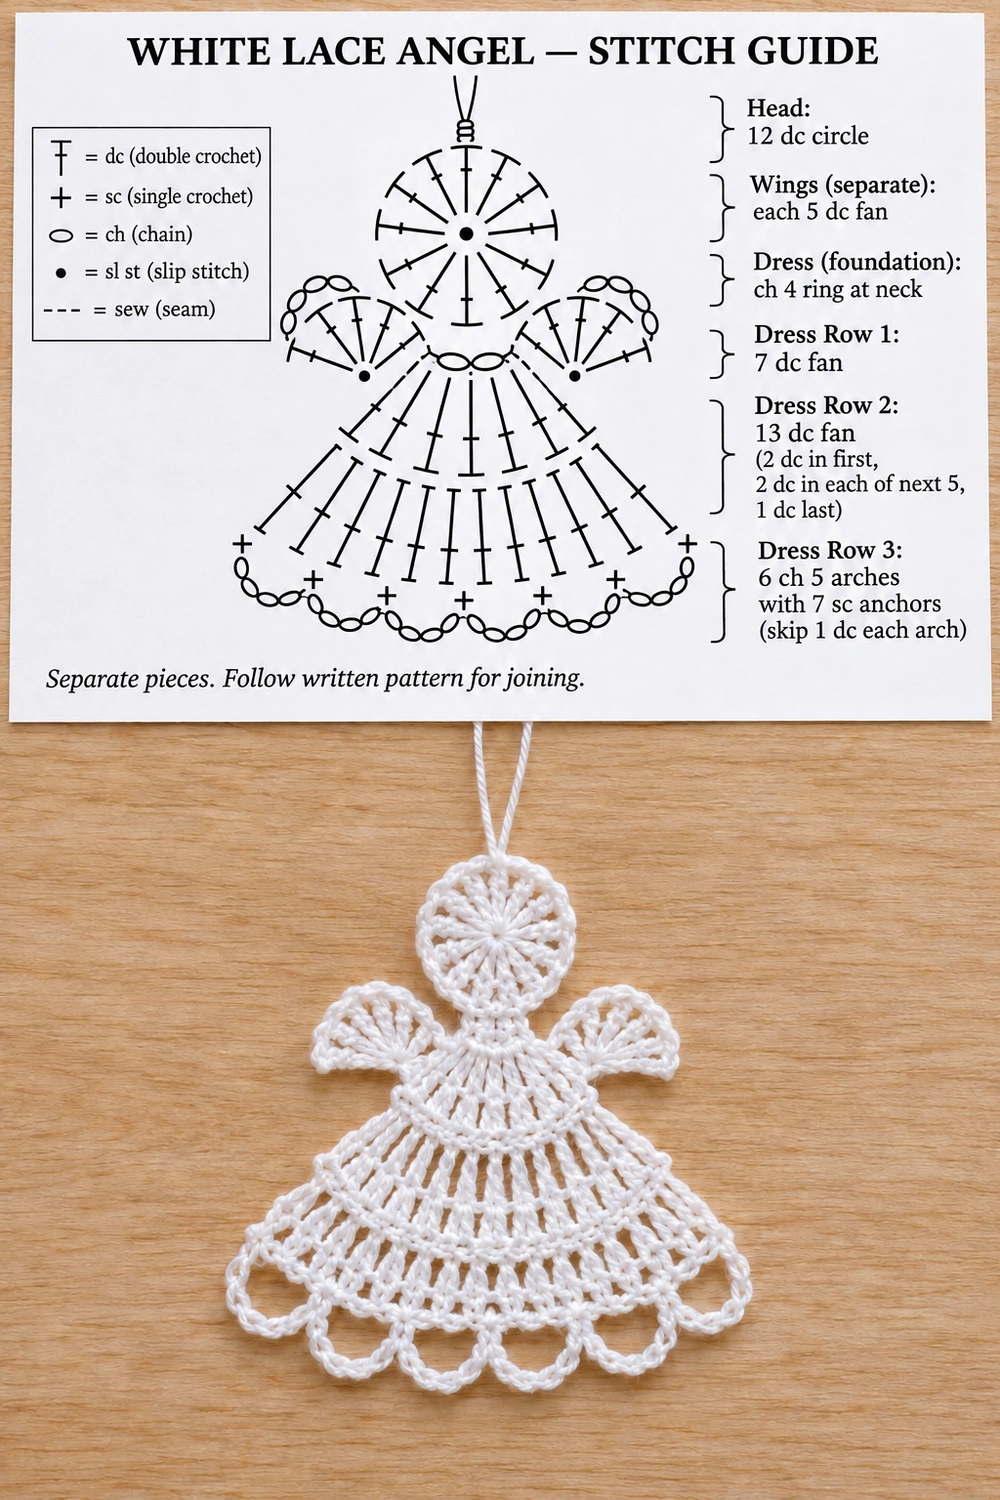
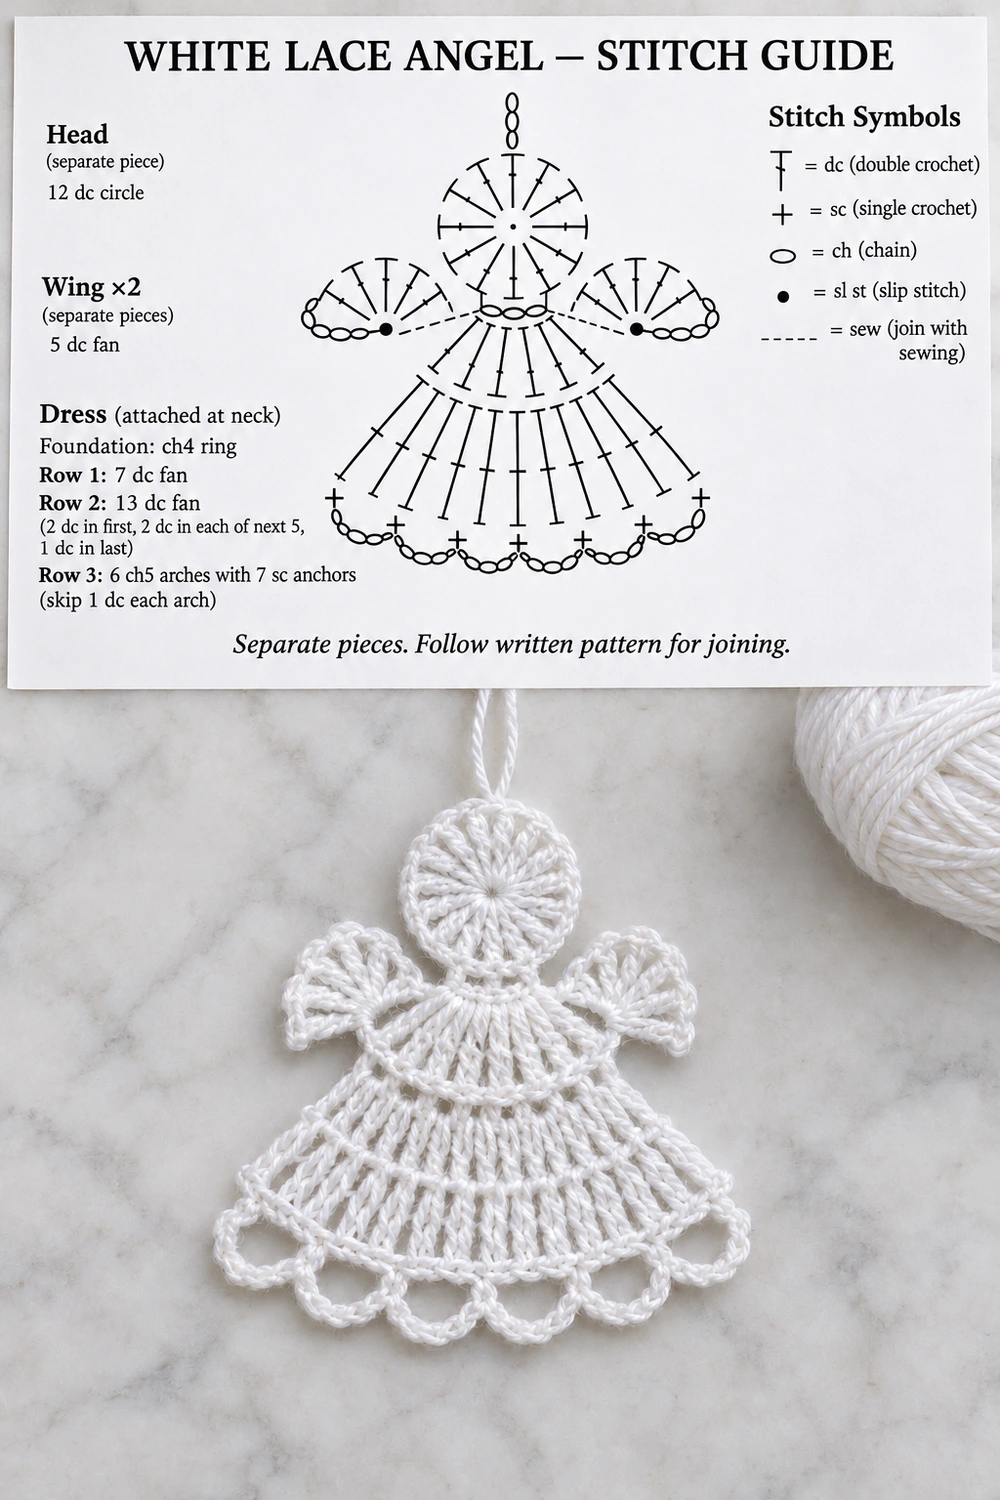
Both guides show one complete angel arrangement on paper above the finished ornament lying on a table. The head, dress, and two wings are separate pieces. Dashed marks at the neck indicate sewing rather than a continuous row of crochet.
The head contains 12 dc. The dress begins with 7 dc, widens to 13 dc, and ends in six ch-5 arches with seven sc anchors. Each wing has five dc plus its ch-3 return arch. Read the English symbol key and follow the written instructions for joins, turning chains, and the final hanging cord.
Helpful Finishing Tips
- Wrong hem count: return to the 13 dc in Row 2. Six skipped stitches and seven sc anchors produce six arches.
- Head curls: confirm that the MR contains 12 dc in total and block gently.
- Wings are uneven: compare their five dc and the tension of their return chains.
- Angel hangs at an angle: reposition the cord at the head’s top center and check the neck seam.
- Storage: lay the ornament flat in tissue paper with the wings and hem loops spread out.
More Free Christmas Crochet Patterns
- Lavender Angel Ornament
- Green and White Christmas Tree
- Lace Bell Ornament
Save Your White Lace Angel Crochet Pattern
Make a few little white angels for your tree or a thoughtful handmade gift. Their simple silhouette and airy hem suit a quiet, classic Christmas display. Happy crocheting from !
Photo Tutorial, Two Tabletop Charts, and Pinterest Images
Find the assembly tutorial, two matching chart-and-piece tabletop views, and three Pinterest images below.